Create and Connect a Micronaut Application to an Amazon Web Services RDS MySQL Database
This guide describes how to create a database application using the Graal Development Kit for Micronaut (GDK). The application presents REST endpoints and stores data in an Amazon Web Services (AWS) Relational Database Service (RDS) for MySQL database using Micronaut® Data JDBC.
AWS RDS for MySQL is a service for MySQL database to set up, operate, and scale MySQL deployments in the cloud. AWS RDS supports MySQL Community Edition versions 5.7 and 8.0.
Micronaut Data is a database access toolkit that uses ahead-of-time compilation to precompute queries for repository interfaces that are then executed by a thin, lightweight runtime layer. Micronaut Data supports the following back ends: JPA (Hibernate and Hibernate Reactive); SQL (JDBC, R2DBC); and MongoDB.
Prerequisites
-
JDK 25 or higher. See Setting up Your Desktop.
-
An Amazon Web Services (AWS) account with enough user permissions to create and manage DB instances in RDS. See Setting up Your Cloud Accounts.
-
The AWS CLI. Follow the AWS documentation for installing or updating the latest version of the AWS CLI.
-
The MySQL client CLI.
-
An Amazon Virtual Private Cloud with a
10.0.0.0/16CIDR block that you have permission to manage. -
An Internet Gateway attached to your Virtual Private Cloud. See How to create and attach an internet gateway to your VPC.
-
The GDK CLI. See Setting up Your Desktop. (Optional.)
Follow the steps below to create the application from scratch. However, you can also download the completed example:

The application ZIP file will be downloaded in your default downloads directory. Unzip it and proceed to the next steps.
A note regarding your development environment
Use the editor or IDE of your choice together with the GDK Launcher or GDK CLI to create, build, and test your application locally.
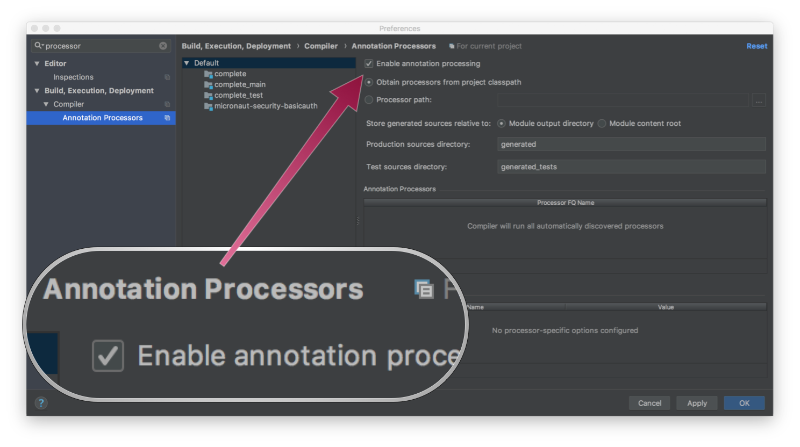
Note: If you use IntelliJ IDEA, enable annotation processing.
Windows platform: The GDK guides are compatible with Gradle only. Maven support is coming soon.
1. Create the Application
Create an application using the GDK Launcher.
-
Open the GDK Launcher in advanced mode.
- Create a new project using the following selections.
- Project Type: Application (Default)
- Project Name: aws-db-demo
- Base Package: com.example (Default)
- Clouds: AWS
- Build Tool: Gradle (Groovy) or Maven
- Language: Java (Default)
- Test Framework: JUnit (Default)
- Java Version: 25 (Default)
- Micronaut Version: (Default)
- Cloud Services: Database
- Features: GraalVM Native Image (Default)
- Sample Code: Yes (Default)
- Click Generate Project, then click Download Zip. The GDK Launcher creates an application with the package
com.examplein a directory named aws-db-demo. The application ZIP file will be downloaded to your default downloads directory. Unzip it, open it in your code editor, and proceed to the next steps.
Alternatively, use the GDK CLI as follows:
Open the micronaut-cli.yml file, you can see what features are packaged with the application:
features: [app-name, data, data-jdbc, flyway, gdk-aws-cloud-app, gdk-aws-database, gdk-bom, gdk-license, graalvm, http-client, java, java-application, jdbc-hikari, junit, logback, maven, maven-enforcer-plugin, micronaut-configuration-validation-gradle-plugin, micronaut-http-validation, micronaut-processing-compiler-args, mysql, native-image-properties, netty-server, properties, readme, serialization-jackson, shade, static-resources, test-resources, validation]The GDK Launcher creates a multi-module project with two subprojects: aws for Amazon Web Services, and lib for common code and configuration shared across cloud platforms. You develop the application logic in the lib subproject, and keep the Amazon Web Services-specific configurations in the aws subproject.
If you enable sample code generation, the GDK Launcher creates the main controller, repository interface, entity, service classes, and tests for you. Consider checking this guide where each sample class is closely examined.
2. Configure Datasource
The GDK Launcher included Flyway for database migrations. It uses the Micronaut integration with Flyway that automates schema changes, significantly simplifies schema management tasks, such as migrating, rolling back, and reproducing in multiple environments. The GDK Launcher enables Flyway in the aws/src/main/resources/application.properties file and configures it to perform migrations on the default datasources.
flyway.datasources.default.enabled=trueIf you specified Flyway as a project feature in the GDK Launcher the build file includes it as a dependency:
Note: Flyway migrations require full control over schema management. By default, the project does not generate schema automatically in aws/src/main/resources/application.properties. If you manually configure
datasources.default.schema-generate=CREATE_DROPset it toNONEto ensure that only Flyway manages your schema.
Configuring multiple datasources is as simple as enabling Flyway for each one. You can also specify directories that will be used for migrating each datasource. For more information, see Micronaut integration with Flyway.
Flyway migration is automatically triggered before your application starts. Flyway reads migration file(s) in the lib/src/main/resources/db/migration/ directory. The migration file with the database schema, lib/src/main/resources/db/migration/V1__schema.sql, was also created for you by the GDK Launcher.
DROP TABLE IF EXISTS genre;

CREATE TABLE genre (
   id    BIGINT NOT NULL AUTO_INCREMENT PRIMARY KEY,
   name  VARCHAR(255) NOT NULL UNIQUE
);
During application startup, Flyway runs the commands in the SQL file and creates the schema needed for the application.
3. Create a MySQL Database Instance Using AWS RDS
You will create a MySQL Database instance with the AWS CLI.
See the AWS CLI rds Command Reference to learn more about AWS RDS.
3.1. Create an Administrator Account
Instead of using your AWS root account, use an administrator account. If you do not have one already, see Setting up Your Cloud Accounts.
3.2. Create VPC, Security Group, Subnets, and Subnet Group (Optional)
To allow connections to the database from your local computer, create the following resources in addition to your VPC to allow access to the database default port from your current public IP address.
Define the VPC name, IG name, subnet group name, the security group name, and the subnets CIDR Blocks:
1 Set your VPC name Ex. GdkVpc
2 Set your IG name Ex. GdkIG
3 Set security group name Ex. GdkSecurityGroup
4 Set subnet group name Ex. GdkSubnetGroup
5 Set CIDR block for subnet 1 Ex. 10.0.0.0/20
6 Set CIDR block for subnet 2 Ex. 10.0.16.0/20
Create VPC and IG with following commands:
Make sure DNS hostname is enabled on your VPC, if not run the following command:
Some of the following commands use
jq, which is a lightweight and flexible command-line JSON processor.
Now let’s create a Route :
Create security group and allow TCP traffic on port 3306 :
Create two subnets on two different availability zones and add them to a subnet group :
And finally create a subnet group and add the subnets to it :
Note: Exposing a database port to the internet is a security risk. This should be done only for development purposes.
3.3. Create a MySQL Instance
3.4. Create a Database and a Database User
-
Connect to the database using the MySQL client CLI (as shown earlier).
-
Create the database. You can use any valid database name (for example,
awsdb):CREATE DATABASE awsdb; -
Create a database user. You can use any valid MySQL username (for example,
awsdb_user) and any valid password:CREATE USER 'awsdb_user' IDENTIFIED BY 'M1cr0n4ut!'; -
Grant access to the database for the new user:
GRANT ALL ON awsdb.* TO 'awsdb_user'; -
Exit the MySQL console by entering "exit".
4. Test the Application
With almost everything in place, you can run the tests.
-
Return to your local IDE where you have opened the Micronaut database application, and open the aws/src/main/resources/application.properties file.
-
The settings configure the datasource for MySQL, specifying the database type, dialect, and driver class:
datasources.default.db-type=mysql
datasources.default.dialect=MYSQL
datasources.default.driver-class-name=com.mysql.cj.jdbc.Driver
Set values for the missing datasources.default.url, datasources.default.username, and datasources.default.password properties by exporting them as environment variables as follows:
where the value of MYSQL_HOST is the private IP address of your MySQL database instance (see section 2.3).
Run the tests:
Then open the file aws/build/reports/tests/test/index.html in a browser to view the results.
Next, you can package this application as a native executable and deploy from the virtual machine, connected to the MySQL database. Deploying as a native executable does not require a Java VM to run, so you can transfer it to another Linux host and run easily.
5. Generate a Native Executable Using GraalVM
The GDK supports compiling Java applications ahead-of-time into native executables using GraalVM Native Image. You can use the Gradle plugin for GraalVM Native Image building/Maven plugin for GraalVM Native Image building. Packaged as a native executable, it significantly reduces application startup time and memory footprint.
Prerequisites: Make sure you have installed a GraalVM JDK. The easiest way to get started is with SDKMAN!. For other installation options, visit the Downloads section.
-
To generate a native executable, use the following command:
-
You can then run the native executable with the following command:
You can customize the name of the resulting binary by updating the Maven/Gradle plugin for GraalVM Native Image configuration.
-
Run this command to create a new
Genreentry in the database table:TEST_RES=$(curl -X "POST" "http://localhost:8080/genres" \ -H 'Content-Type: application/json; charset=utf-8' \ -d $'{ "name": "music" }') echo "Result: $TEST_RES" -
Then list all genres:
TEST_RES=$(curl -s localhost:8080/genres/list)
echo "Result: $TEST_RES"
As a reminder, you do not need to install a Java VM on the virtual machine to run the application. The native executable is a self-contained binary. Deploying from a native executable significantly reduces application startup time and memory footprint.
6. Stop Database Instance and Clean Up
Once you are done with this guide, you can stop and/or delete the AWS resources created to avoid incurring unnecessary charges. Run these commands:
And to delete the created VPC and internet gateway IG. Run these commands:
Summary
This guide demonstrated how to use the GDK to create and access a database application that stores data in an AWS RDS MySQL database using Micronaut Data JDBC. You also learned how to package this application into a native executable.