Create and Connect a Spring Application to Amazon S3 Object Storage
This guide describes how to use the Graal Development Kit for Micronaut (GDK) to create a Spring Boot 3 application that demonstrates how to store, retrieve, and delete user profile pictures in Amazon Web Services (AWS) S3 Object Storage using the Micronaut® Object Storage API.
The Micronaut Object Storage API provides a uniform API to create, read and delete objects in the major cloud providers:
- Amazon S3
- Google Cloud Storage
- Oracle Cloud Infrastructure Object Storage
Using this API enables the creation of truly multicloud, portable applications.
Prerequisites #
- JDK 17 or higher. See Setting up Your Desktop.
- An Amazon Web Services (AWS) account. See Setting up Your Cloud Accounts.
- The AWS CLI.
- An AWS user with enough permissions to create and manage AWS S3 buckets.
Follow the steps below to create the application from scratch. However, you can also download the completed example:

A note regarding your development environment
Consider using Visual Studio Code, which provides native support for developing applications with the Graal Development Kit extension.
Note: If you use IntelliJ IDEA, enable annotation processing.
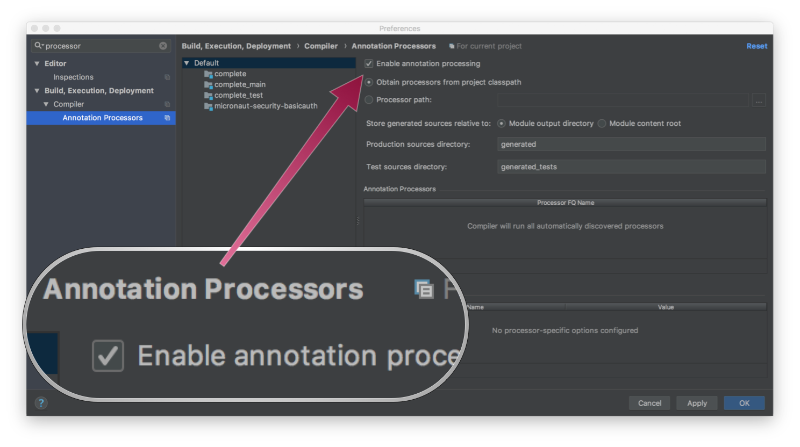
Windows platform: The GDK guides are compatible with Gradle only. Maven support is coming soon.
1. Create the Spring Boot Application #
Generate a Spring Boot application using Spring Initializr with Spring Web.
1.1. Add Dependencies #
Add the following dependencies to your build file as described in Using the Micronaut Spring Boot Starter to use Micronaut Features within a Spring Boot application.
build.gradle
Add the Oracle Public Repository to the repositories block:
maven { url "https://maven.oracle.com/public" }Add the following dependencies:
implementation enforcedPlatform("cloud.graal.gcn:gcn-bom:4.2.1.2")
implementation platform("io.micronaut.platform:micronaut-platform:4.2.1-oracle-00001")
annotationProcessor platform('io.micronaut.platform:micronaut-platform:4.2.1-oracle-00001')
annotationProcessor("io.micronaut:micronaut-inject-java")
implementation("io.micronaut.spring:micronaut-spring-boot-starter")
pom.xml
Add the Micronaut version to the properties element:
<micronaut.version>4.2.1-oracle-00001</micronaut.version>
<micronaut.platform.version>4.2.1-oracle-00001</micronaut.platform.version>
Add the following repositories element:
<repositories>
   <repository>
      <id>gcn</id>
      <url>https://maven.oracle.com/public</url>
   </repository>
   <repository>
      <id>central</id>
      <url>https://repo.maven.apache.org/maven2</url>
   </repository>
</repositories>
Add the following dependencyManagement element:
<dependencyManagement>
    <dependencies>
      <dependency>
        <groupId>org.springframework</groupId>
        <artifactId>spring-framework-bom</artifactId>
        <version>${spring-framework.version}</version>
        <type>pom</type>
        <scope>import</scope>
      </dependency>
      <dependency>
        <groupId>cloud.graal.gcn<</groupId>
        <artifactId>gcn-bom</artifactId>
        <version>4.2.1.2</version>
        <type>pom</type>
        <scope>import</scope>
      </dependency>
      <dependency>
        <groupId>io.micronaut.platform</groupId>
        <artifactId>micronaut-platform</artifactId>
        <version>${micronaut.platform.version}</version>
        <type>pom</type>
        <scope>import</scope>
      </dependency>
    </dependencies>
</dependencyManagement>
Add the following plugin to the build/plugins element:
<plugin>
  <groupId>org.apache.maven.plugins</groupId>
  <artifactId>maven-compiler-plugin</artifactId>
  <configuration>
    <annotationProcessorPaths combine.children="append">
      <path>
        <groupId>io.micronaut</groupId>
        <artifactId>micronaut-inject-java</artifactId>
        <version>${micronaut.version}</version>
      </path>
    </annotationProcessorPaths>
    <compilerArgs>
      <arg>-Amicronaut.processing.group=com.example</arg>
      <arg>-Amicronaut.processing.module=gdkguide</arg>
    </compilerArgs>
  </configuration>
</plugin>
</plugins>
Add these dependencies to your dependencies element:
<dependency>
  <groupId>io.micronaut.spring</groupId>
  <artifactId>micronaut-spring-boot-starter</artifactId>
  <scope>compile</scope>
</dependency>
Additionally, add the following dependency to use Micronaut AWS Object Storage:
build.gradle
implementation("io.micronaut.objectstorage:micronaut-object-storage-aws")pom.xml
<dependency>
    <groupId>io.micronaut.objectstorage</groupId>
    <artifactId>micronaut-object-storage-aws</artifactId>
    <scope>compile</scope>
</dependency>
1.2. Enable Micronaut #
Add the @EnableMicronaut annotation for Spring Boot to start the Micronaut context. Edit the file named src/main/java/com/example/Application.java as follows:
package com.example;

import io.micronaut.spring.boot.starter.EnableMicronaut;
import org.springframework.boot.SpringApplication;
import org.springframework.boot.autoconfigure.SpringBootApplication;

@SpringBootApplication
@EnableMicronaut
public class Application {
    public static void main(String[] args) {
        SpringApplication.run(Application.class, args);
    }
}
1.3. Create a Service #
Define a service that interacts with Object Storage in a file named src/main/java/com/example/PictureService.java, as follows:
package com.example;

import io.micronaut.objectstorage.ObjectStorageEntry;
import io.micronaut.objectstorage.ObjectStorageException;
import io.micronaut.objectstorage.ObjectStorageOperations;
import io.micronaut.objectstorage.request.UploadRequest;
import org.slf4j.Logger;
import org.slf4j.LoggerFactory;
import org.springframework.stereotype.Service;

import java.io.IOException;
import java.io.InputStream;
import java.util.Optional;

@Service
public class PictureService {

    private static final Logger LOG = LoggerFactory.getLogger(PictureService.class);
    private ObjectStorageOperations<?, ?, ?> pictureBucket;

    public PictureService(ObjectStorageOperations<?,?,?> pictureBucket) { // <1>
        this.pictureBucket = pictureBucket;
    }

    public boolean upload(String name, InputStream inputStream) {
        try {
            pictureBucket.upload(UploadRequest.fromBytes(inputStream.readAllBytes(), name)); // <2> <3>
            return true;
        } catch (IOException | ObjectStorageException ex) {
            LOG.error("Failed to upload picture: " + name, ex);
            return false;
        }
    }

    public Optional<InputStream> download(String name) {
        try {
            return pictureBucket.retrieve(name).map(ObjectStorageEntry::getInputStream); // <4>
        } catch (ObjectStorageException ex) {
            LOG.error("Failed to download picture: " + name, ex);
            return Optional.empty();
        }
    }

    public void delete(String name) {
        pictureBucket.delete(name); // <5>
    }
}
1 Parent interface that enables you to use the API in a generic way for all cloud providers.
2 You can use any of the UploadRequest static methods to build an upload request.
3 The upload operation returns an UploadResponse, which wraps the cloud-specific SDK response object.
4 The retrieve operation returns an ObjectStorageEntry, from which you can get an InputStream. There is also a getNativeEntry() method that gives you access to the cloud vendor-specific response object.
5 The delete operation returns the cloud vendor-specific delete response object in case you need it.
1.4. Create a Controller #
Create a Controller in a file named src/main/java/com/example/PictureController.java:
package com.example;

import org.springframework.http.HttpStatus;
import org.springframework.http.ResponseEntity;
import org.springframework.stereotype.Controller;
import org.springframework.web.bind.annotation.DeleteMapping;
import org.springframework.web.bind.annotation.GetMapping;
import org.springframework.web.bind.annotation.PostMapping;
import org.springframework.web.bind.annotation.RequestParam;
import org.springframework.web.bind.annotation.ResponseBody;
import org.springframework.web.multipart.MultipartFile;

import java.io.IOException;
import java.io.InputStream;
import java.util.List;
import java.util.Optional;

@Controller
public class PictureController {

    private final static List<String> ALLOWED_UPLOAD_EXTENSIONS = List.of("png", "jpg", "jpeg");
    private static final String PICTURE = "picture.png"; // <1>
    private static final String MISSING_PICTURE = "default.png"; // <2>

    private PictureService pictureService;

    public PictureController(PictureService pictureService) {
        this.pictureService = pictureService;
    }

    @GetMapping
    public String index() {
        return "index.html";
    }

    @GetMapping("/download")
    @ResponseBody
    public byte[] download() throws IOException {
        try(InputStream is = pictureService.download(PICTURE).orElse(getResourceAsStream(MISSING_PICTURE))) {
            return is.readAllBytes();
        }
    }

    @PostMapping ("/upload")
    public ResponseEntity<String> upload(@RequestParam("file") MultipartFile file) throws IOException {

        if(file != null) {
            Optional<String> extension = Optional.ofNullable(file.getOriginalFilename())
                    .filter(f -> f.contains("."))
                    .map(f -> f.substring(file.getOriginalFilename().lastIndexOf(".") + 1));

            if(extension.isPresent() && ALLOWED_UPLOAD_EXTENSIONS.contains(extension.get())) {
                if(pictureService.upload(PICTURE, file.getInputStream())) {
                    return new ResponseEntity<>(file.getOriginalFilename() + " was successfully uploaded", HttpStatus.OK);
                }
            }
        }

        return new ResponseEntity<>("Could not upload picture", HttpStatus.BAD_REQUEST);
    }

    @DeleteMapping("/delete")
    @ResponseBody
    public void delete() {
        pictureService.delete(PICTURE);
    }

    private InputStream getResourceAsStream(String resourceName) {
        return getClass().getClassLoader().getResourceAsStream(resourceName);
    }
}
1 Name of the ‘object’ being stored, used for all operations (upload, download and delete).
2 Name of the default picture in src/main/resources. (Not essential for the application to run.)
1.5. Create an HTML Page #
Create a simple HTML page to display the image in a browser. Create a new file named src/main/resources/static/index.html with the following contents:
<!DOCTYPE html>
<html lang="en">
  <head>
    <meta charset="UTF-8">
    <title>Object Storage Example</title>
  </head>
  <body>
    <h1>Spring Boot Example using Object Storage</h1>
    <div>
      <img src="/download">
    </div>
  </body>
</html>
1.6. Write Tests to Verify Application Logic #
Create a test class for the controller in src/test/java/com/example/PictureControllerTest.java, as follows:
package com.example;

import org.junit.jupiter.api.Test;
import org.springframework.beans.factory.annotation.Autowired;
import org.springframework.boot.test.autoconfigure.web.servlet.WebMvcTest;
import org.springframework.boot.test.mock.mockito.MockBean;
import org.springframework.mock.web.MockMultipartFile;
import org.springframework.test.web.servlet.MockMvc;

import java.io.InputStream;
import java.util.Optional;

import static org.mockito.ArgumentMatchers.any;
import static org.mockito.ArgumentMatchers.eq;
import static org.mockito.BDDMockito.given;
import static org.springframework.test.web.servlet.request.MockMvcRequestBuilders.get;
import static org.springframework.test.web.servlet.request.MockMvcRequestBuilders.multipart;
import static org.springframework.test.web.servlet.result.MockMvcResultMatchers.header;
import static org.springframework.test.web.servlet.result.MockMvcResultMatchers.status;

@WebMvcTest(PictureController.class)
class PictureControllerTest {

    @Autowired
    private MockMvc mockMvc;

    @MockBean
    private PictureService service;

    @Test
    void testUpload() throws Exception {

        byte[] bytes = getResource().readAllBytes();

        MockMultipartFile multipartFile = new MockMultipartFile("file", "test.png", null, bytes);

        given(service.upload(eq("picture.png"), any(InputStream.class))).willReturn(true);

        mockMvc.perform(multipart("/upload")
                .file(multipartFile)).andExpect(status().isOk());
    }

    @Test
    void testDownload() throws Exception {

        Optional<InputStream> resource = Optional.of(getResource());
        given(service.download("picture.png")).willReturn(resource);

        mockMvc.perform(get("/download"))
                .andExpect(status().isOk())
                .andExpect(header().longValue("Content-Length", getResource().readAllBytes().length));
    }

    private InputStream getResource() {
        return getClass().getClassLoader().getResourceAsStream("my_picture.png"); // <1>
    }
}
1 If you are not using the downloaded example, add an image file named my_picture.png to the src/main/resources/ directory.
2. Set up AWS Resources #
Start with creating an administrator account, then create a bucket.
2.1. Create an Administrator Account #
Instead of using your AWS root account, use an administrator account. If you do not have one already, see Setting up Your Cloud Accounts.
2.2. Create a Bucket #
Create an Amazon S3 bucket using the aws CLI (assuming that your default region is us-east-1):
aws s3api create-bucket --bucket gdk-guide-object-storage --region=us-east-1
Bucket names must be unique across all AWS accounts.
If you want to create the bucket in a region other than us-east-1, you need additional parameters. For example, to create the bucket in the eu-west-3 region, use the following command:
aws s3api create-bucket \
    --bucket gdk-guide-object-storage \
    --region eu-west-3 \
    --create-bucket-configuration LocationConstraint=eu-west-3
Then, configure the bucket in src/main/resources/application.properties:
micronaut.object-storage.aws.default.bucket=gdk-guide-object-storage
Note: Your default region is automatically detected from the configuration you created using
aws configure.
2.3. Configure the Upload Parameters #
If you want to upload a file larger than 1MB, you need to configure this in the src/main/resources/application.properties file as follows:
# 20 * 1024 * 1024 = 20MB
micronaut.server.multipart.max-file-size: 20971520
3. Run the Tests (Optional) #
If you are not using the downloaded example, add an image file named my_picture.png to the src/main/resources/ directory.
Use the following command to run the test.
./gradlew testThen open the file build/reports/tests/test/index.html in a browser to view the results.
./mvnw test4. Run the Application #
To run the application, use the following command, which starts the application on port 8080.
5. Test the Application #
Test the application by uploading, downloading, and deleting a user profile picture.
5.1. Upload a Picture #
If using the complete solution, navigate into the src/main/resources/ directory before running the following command. Otherwise, update the my_picture.png file with an image you want to upload.
curl -i -F "file=@my_picture.png" http://localhost:8080/upload
Use the aws CLI to verify that the file has been uploaded to an S3 bucket, as follows:
aws s3 ls s3://gdk-guide-object-storage/
5.2. View the Website #
Open a browser to http://localhost:8080 and you should see:
5.3. Download the Picture #
Use the following command to download a picture:
curl http://localhost:8080/download --raw -o image.png
5.4. Delete the Picture #
Use the following command to delete a picture:
curl -X "DELETE" http://localhost:8080/delete
Then, check that the file has actually been deleted using the following command:
aws s3 ls s3://gdk-guide-object-storage/
6. Clean up #
When you have completed the guide, remove the bucket from S3 to avoid stale resources. Use the following command to delete the bucket:
aws s3api delete-bucket --bucket gdk-guide-object-storage --region us-east-1
Summary #
This guide demonstrated how to create a Spring Boot application to store, retrieve, and delete user profile pictures in Amazon Web Services S3 Object Storage.