Secure an Application with Google OpenID Connect
In this guide, you will create an application and secure it with Google OpenID Connect. Google provides OAuth 2.0 APIs for both authentication and authorization, which conform to the OpenID Connect specification and is OpenID Certified.
Prerequisites #
- JDK 17 or higher. See Setting up Your Desktop.
- A Google Cloud Platform (GCP) account. See Setting up Your Cloud Accounts.
- The GCN CLI. See Setting up Your Desktop. (Optional.)
Follow the steps below to create the application from scratch. However, you can also download the completed example in Java:

A note regarding your development environment
Consider using Visual Studio Code that provides native support for developing applications with the Graal Cloud Native Tools extension.
Note: If you use IntelliJ IDEA, enable annotation processing.
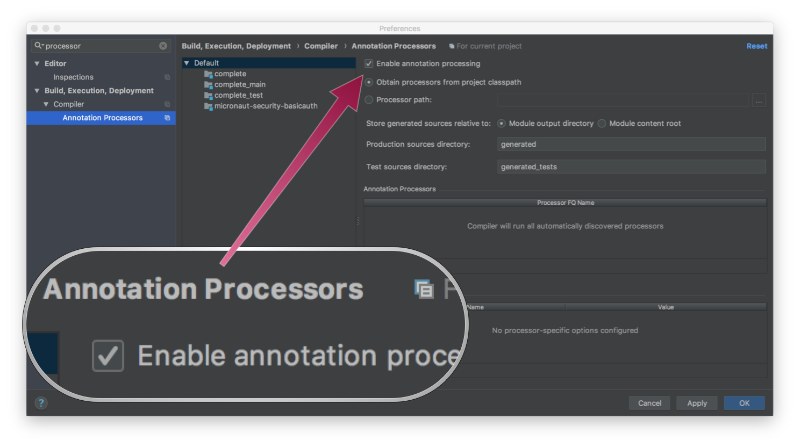
Windows platform: The GCN guides are compatible with Gradle only. Maven support is coming soon.
1. Create the Application #
Create an application using the GCN Launcher.
-
Open the GCN Launcher in advanced mode.
- Create a new project using the following selections.
- Project Type: Application (default)
- Project Name: gcp-security-demo
- Base Package: com.example (Default)
- Clouds: GCP
- Language: Java (default)
- Build Tool: Gradle (Groovy) or Maven
- Test Framework: JUnit (default)
- Java Version: 17 (default)
- Micronaut Version: (default)
- Cloud Services: Security
- Features: GraalVM Native Image (Default)
- Sample Code: Yes (Default)
- Click Generate Project, then click Download Zip. The GCN Launcher creates an application with the default package
com.examplein a directory named gcp-security-demo. The application ZIP file will be downloaded in your default downloads directory. Unzip it, open in your code editor, and proceed to the next steps.
Alternatively, use the GCN CLI as follows:
gcn create-app com.example.gcp-security-demo \
    --clouds=gcp \
    --services=security \
    --features=graalvm \
    --build=gradle \
    --jdk=17 \
    --lang=java
gcn create-app com.example.gcp-security-demo \
--clouds=gcp \
--services=security \
--features=graalvm \
--build=maven \
--jdk=17 \
--lang=javaFor more information, see Using the GCN CLI.
1.1. AuthController #
The GCN Launcher created a class named AuthController to handle requests to /. It displays the email of an authenticated person, if any. The controller endpoint is annotated with a @View annotation that uses a JTE template. The file named gcp/src/main/java/com/example/AuthController.java has the following contents:
package com.example;

import io.micronaut.core.annotation.Nullable;
import io.micronaut.http.annotation.Controller;
import io.micronaut.http.annotation.Get;
import io.micronaut.security.annotation.Secured;
import io.micronaut.security.authentication.Authentication;
import io.micronaut.views.View;

import java.util.Collections;
import java.util.HashMap;
import java.util.Map;

import static io.micronaut.security.rules.SecurityRule.IS_ANONYMOUS;
import static io.micronaut.security.rules.SecurityRule.IS_AUTHENTICATED;

@Controller // <1>
class AuthController {

    @Secured(IS_ANONYMOUS) // <2>
    @View("auth") // <3>
    @Get // <4>
    Map<String, Object> index(@Nullable Authentication authentication) { // <5>
        Map<String, Object> model = new HashMap<>();
        if (authentication != null) {
            model.put("username", authentication.getAttributes().get("email"));
        } else {
            model.put("username", "Anonymous");
        }
        return model;
    }

    @Secured(IS_AUTHENTICATED) // <6>
    @Get("/secure") // <7>
    Map<String, Object> secured() {
        return Collections.singletonMap("secured", true); // <8>
    }
}
1 The class is defined as a controller with the @Controller annotation mapped to the path /.
2 Annotate with @Secured to configure secured access. The SecurityRule.IS_ANONYMOUS expression allows access without authentication.
3 Use the @View annotation to specify which template to use to render the response.
4 The @Get annotation maps the index method to an HTTP GET request on /.
5 Micronaut Security will inject the Authentication instance as a method parameter; by annotating with @Nullable, you can determine whether the user is authenticated or not, and populate the model map accordingly.
6 Annotate with @Secured to configure secured access. The SecurityRule.IS_AUTHENTICATED expression allows access only to authenticated users.
7 The @Get annotation maps the secured method to an HTTP GET request on /secure.
8 This method simply returns a model map that will be rendered as JSON (because there is no @View annotation).
1.2. JTE Template #
The GCN Launcher created a JTE template in a file named gcp/src/main/jte/auth.jte to render the UI for the controller. It has the following contents:
@param String username
@param java.util.Map<?, ?> security

<!DOCTYPE html>
<html lang="en">
<head>
    <title>GCN - OpenID Connect</title>
</head>
<body>
<h1>GCN - OpenID Connect</h1>

<h2>username: <span>${username}</span></h2>

<nav>
    <ul>
    @if(security == null)
        <li><a href="/oauth/login/gcn">Enter</a></li>
    @else
        <li><a href="/logout">Logout</a></li>
    @endif
    </ul>
</nav>
</body>
</html>
2. Create an OAuth 2.0 Application in Google Cloud Console #
-
Go to the Google Console and create a new project named “gcn-guides”:
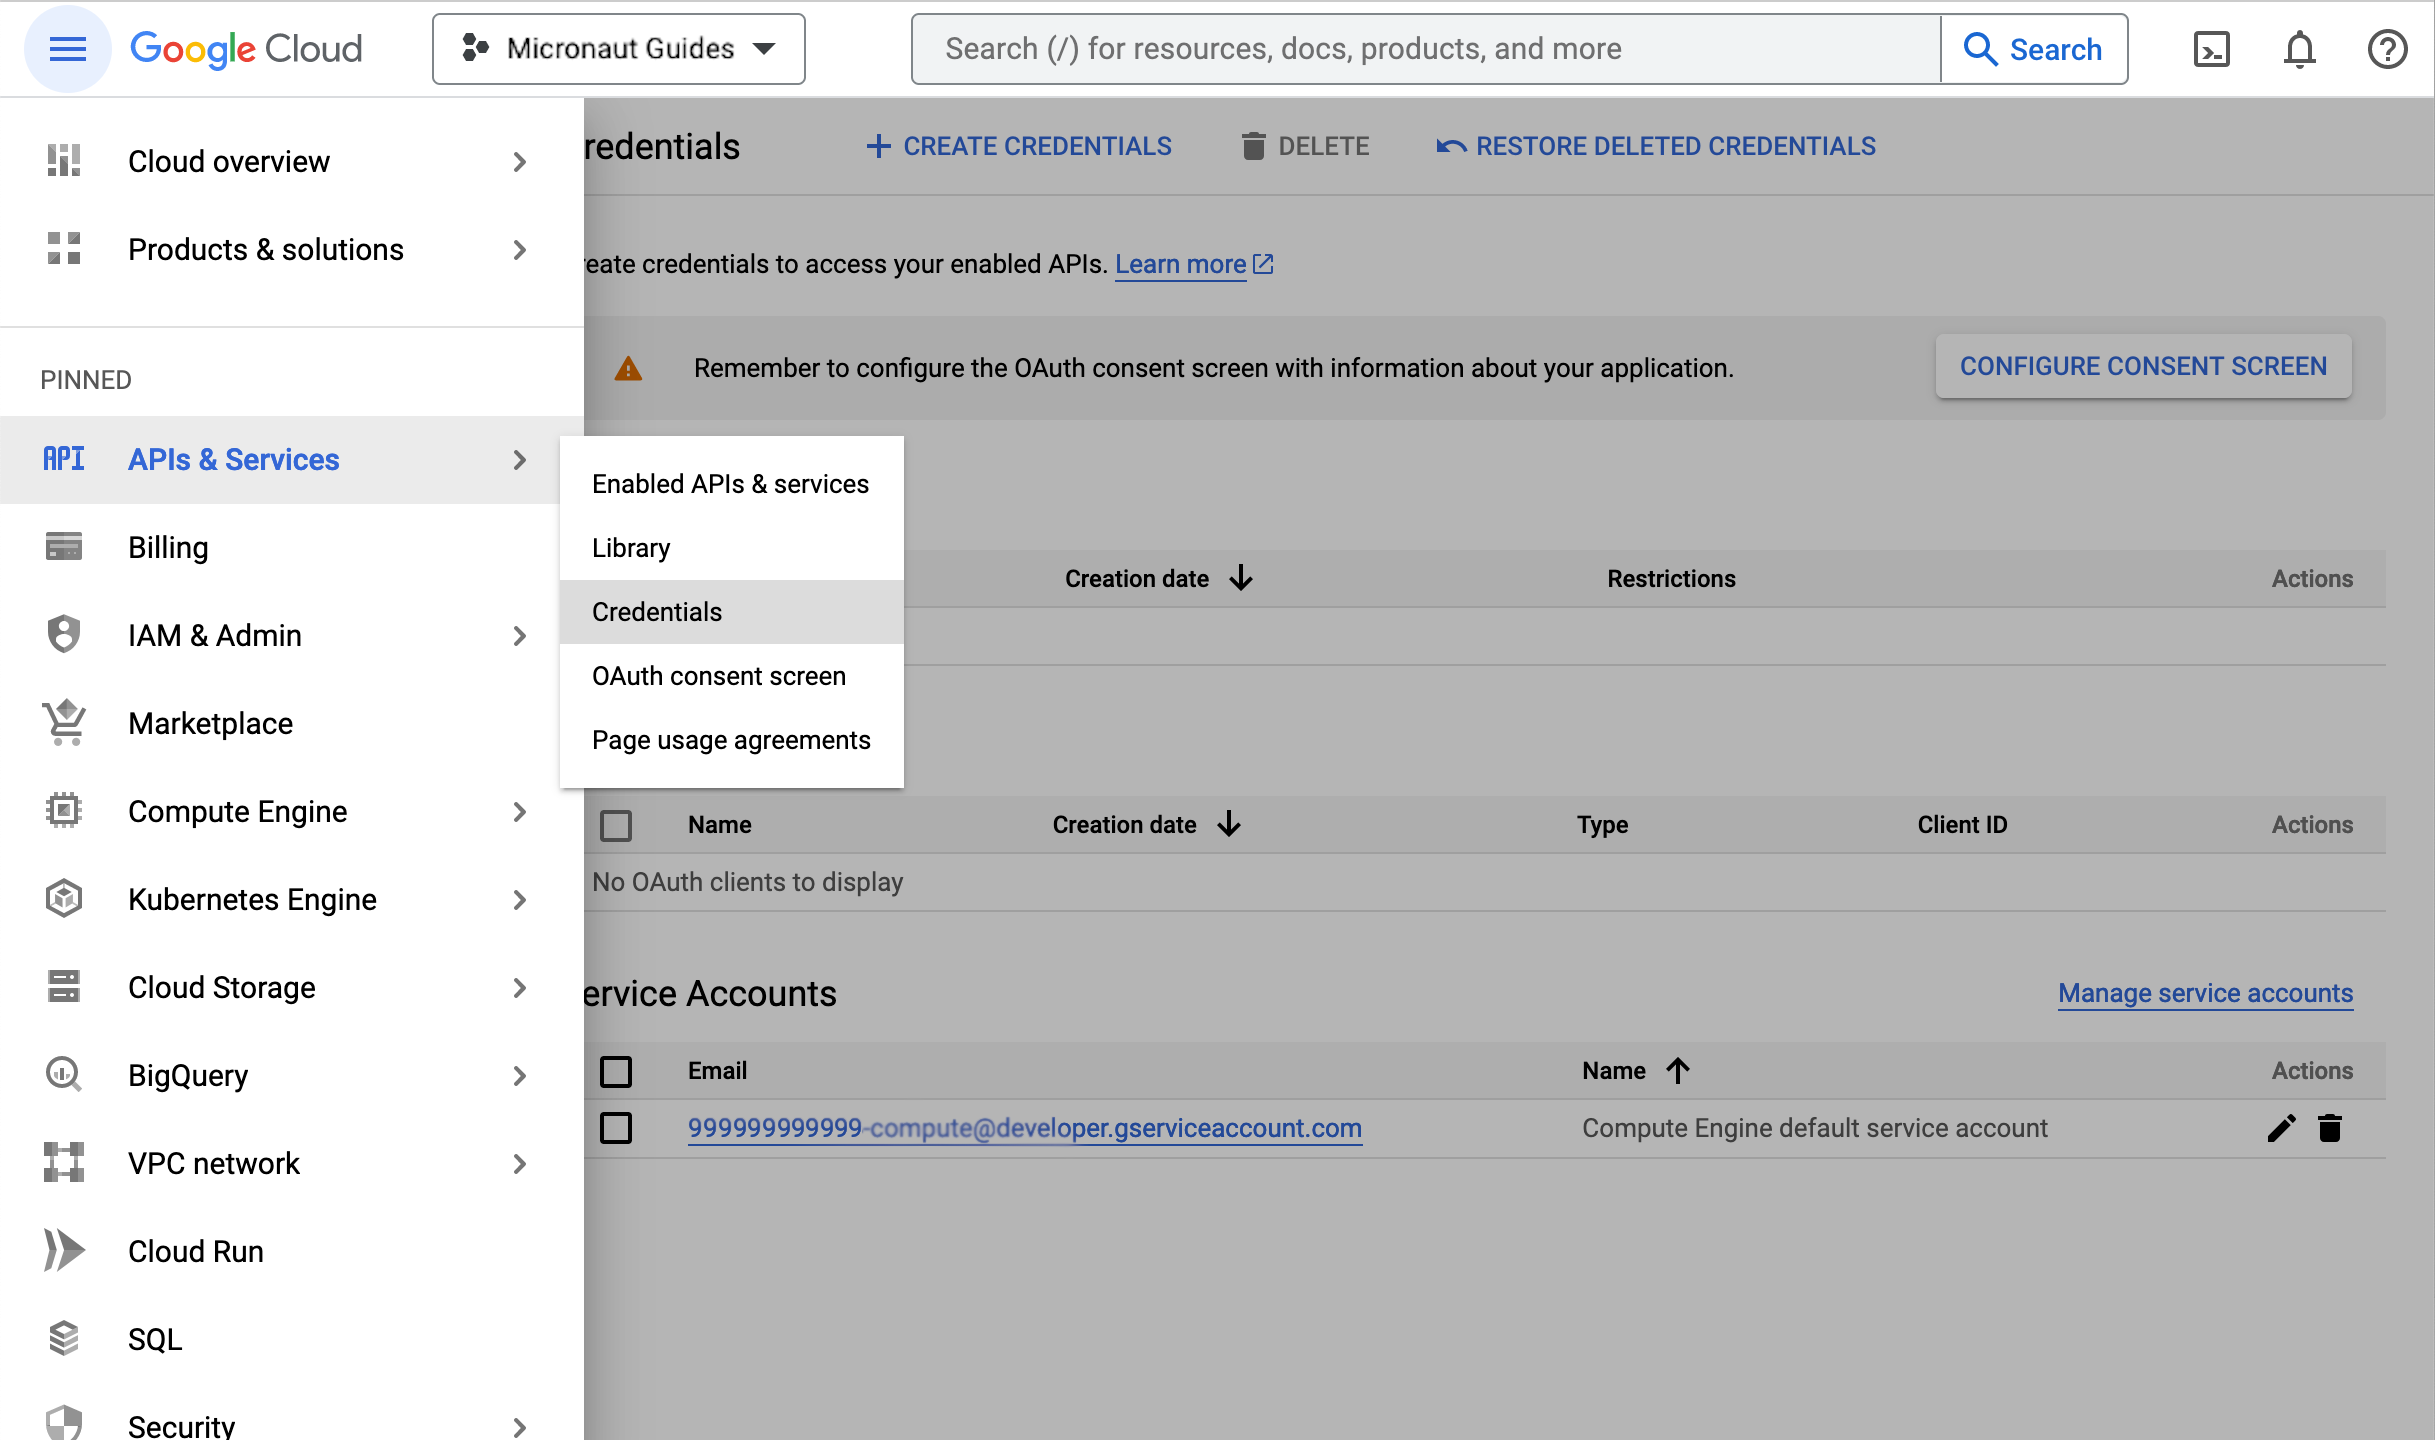
-
Create OAuth 2.0 credentials for the project, because Google does not do that automatically. From the sidebar, open the navigation menu, then under APIs & Services click Credentials:
-
If you haven’t already configured the consent screen, you’ll see a message similar to:

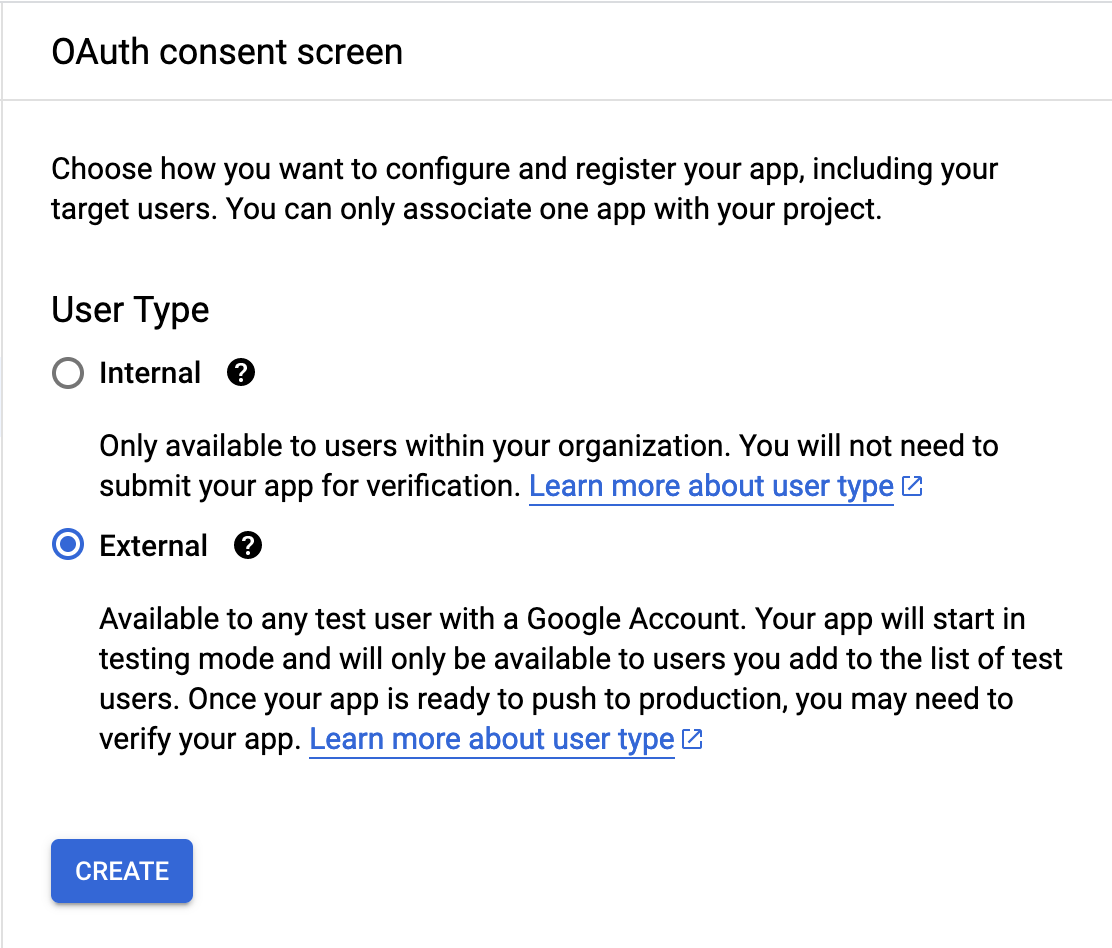
-
Click Configure Consent Screen, and choose User Type External and click Create:
-
Choose an app name (for example, “GCN Guides”):
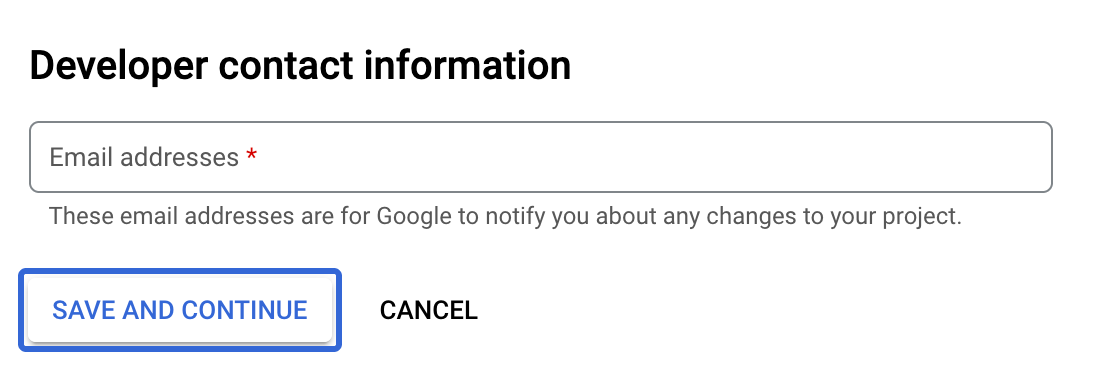
-
Enter the required email addresses, then click Save and Continue:
-
No extra scopes are needed, so click Save and Continue on the next screen:
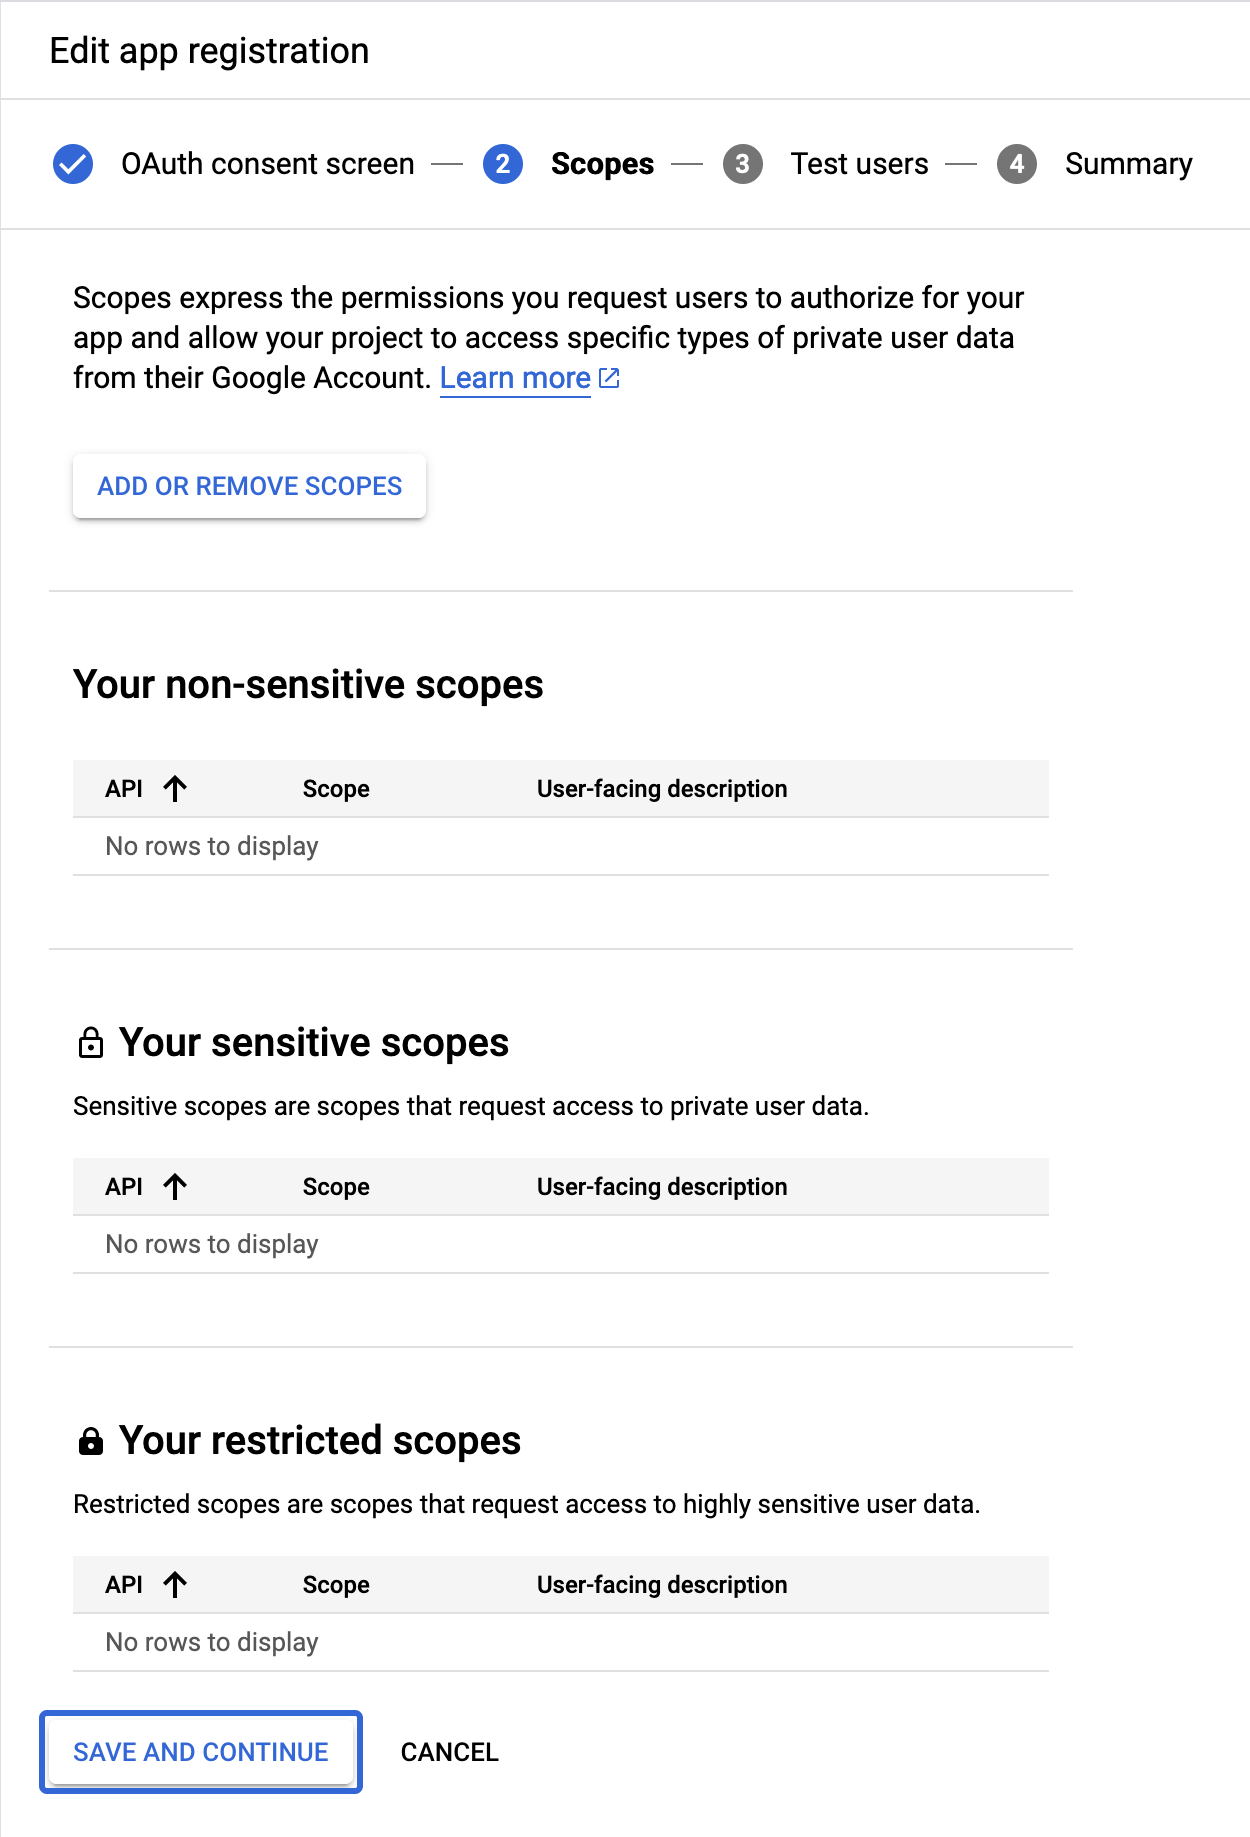
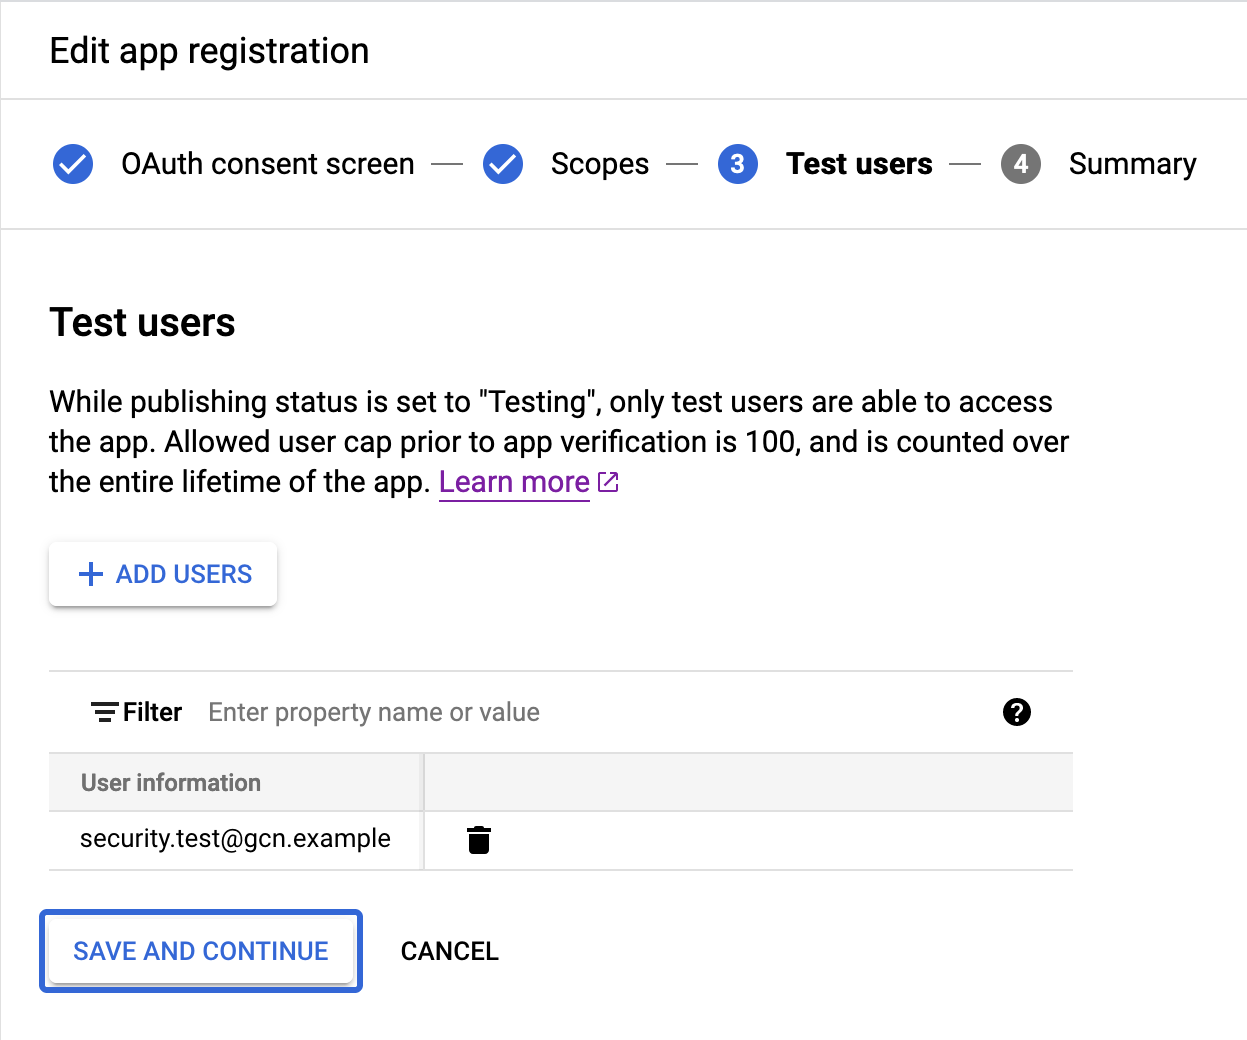
-
Enter one or more email addresses with which to test, then click Save and Continue:
-
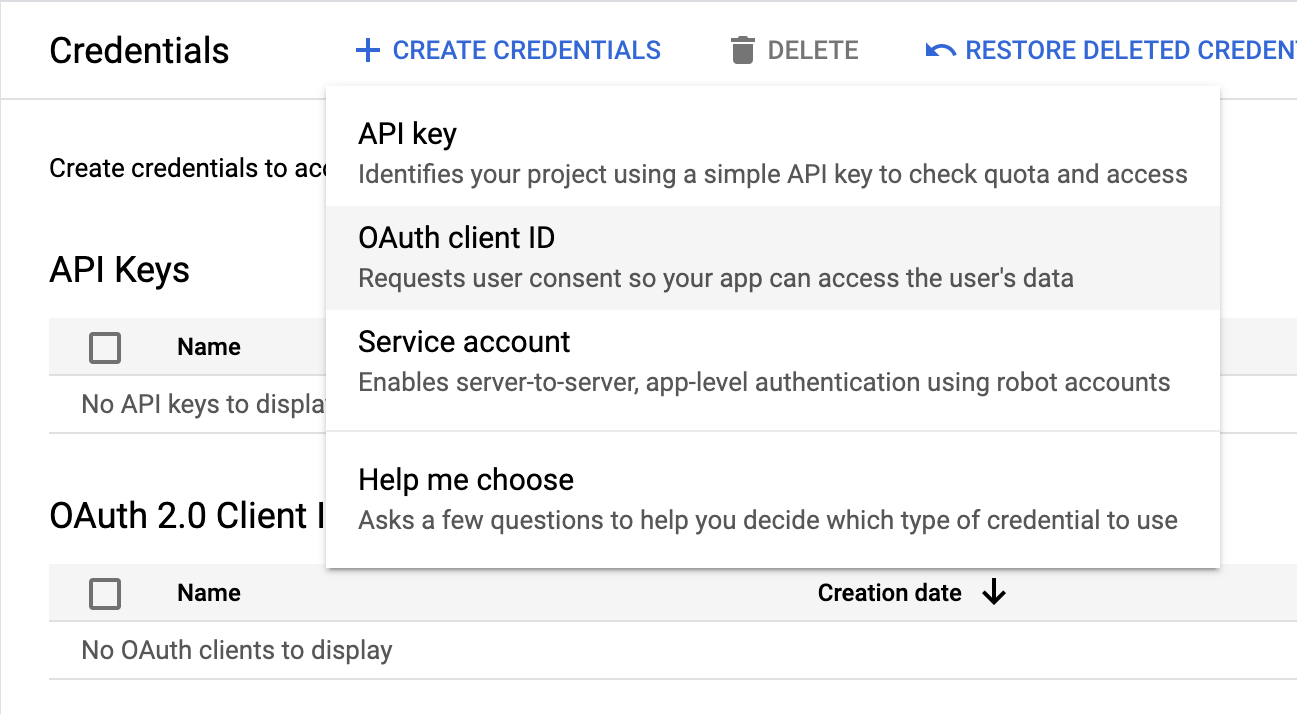
Return to the credentials screen and click Create Credentials, then select OAuth client ID from the drop-down list:
-
Select “Web application” as the Application Type and enter a name for the client, for example, “GCN Guide Client”. Under Authorized redirect URIs click ADD URI and enter
http://localhost:8080/oauth/callback/gcn. Finally, click Create: -
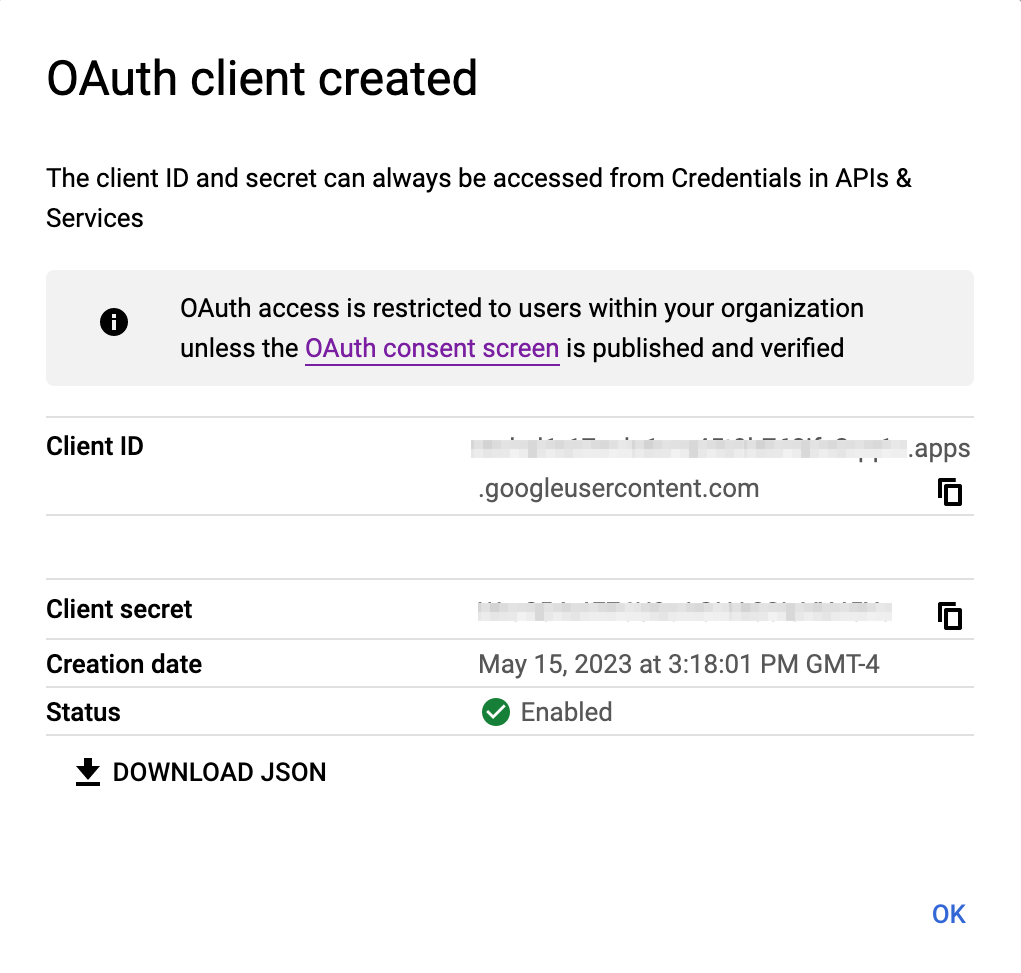
Save the Client ID and Client secret, you will need these values later.
2.1. OAuth 2.0 integration #
The initial security configuration was generated in the file named gcp/src/main/resources/application.properties:
micronaut.application.name=gcp
# <1>
micronaut.security.authentication=idtoken
# <2>
micronaut.security.endpoints.logout.get-allowed=true
micronaut.security.endpoints.logout.enabled=true
# <3> <4>
micronaut.security.oauth2.clients.gcn.client-id=${OAUTH_CLIENT_ID\:xxx}
# <3> <5>
micronaut.security.oauth2.clients.gcn.client-secret=${OAUTH_CLIENT_SECRET\:yyy}
# <5>
micronaut.security.oauth2.clients.gcn.openid.issuer=https\://accounts.google.com
1 Set micronaut.security.authentication as idtoken.
The idtoken provided by Google when the OAuth 2.0 Authorization code flow ends will be saved in a cookie.
The token is a signed JSON Web Token (JWT).
For every request, the Micronaut framework extracts the JWT from the cookie and validates the JWT signature with the remote JSON Web Key Set (JWKS) exposed by Google.
The JWKS is exposed by the jws-uri entry of Google .well-known/openid-configuration.
2 Accept GET request to the /logout endpoint.
3 The provider identifier must match the last part of the URL you entered as a redirect URL.
4 Client ID. See previous screenshot.
5 Client Secret. See previous screenshot.
6 The issuer URL. It allows the Micronaut framework to discover the configuration of the OpenID Connect server.
The previous configuration uses placeholders. Create OAUTH_CLIENT_ID and OAUTH_CLIENT_SECRET environment variables for them, as follows:
export OAUTH_CLIENT_ID=XXXXXXXXXX
export OAUTH_CLIENT_SECRET=YYYYYYYYYY
You will use an Authorization Code grant flow which as described in the following diagram:
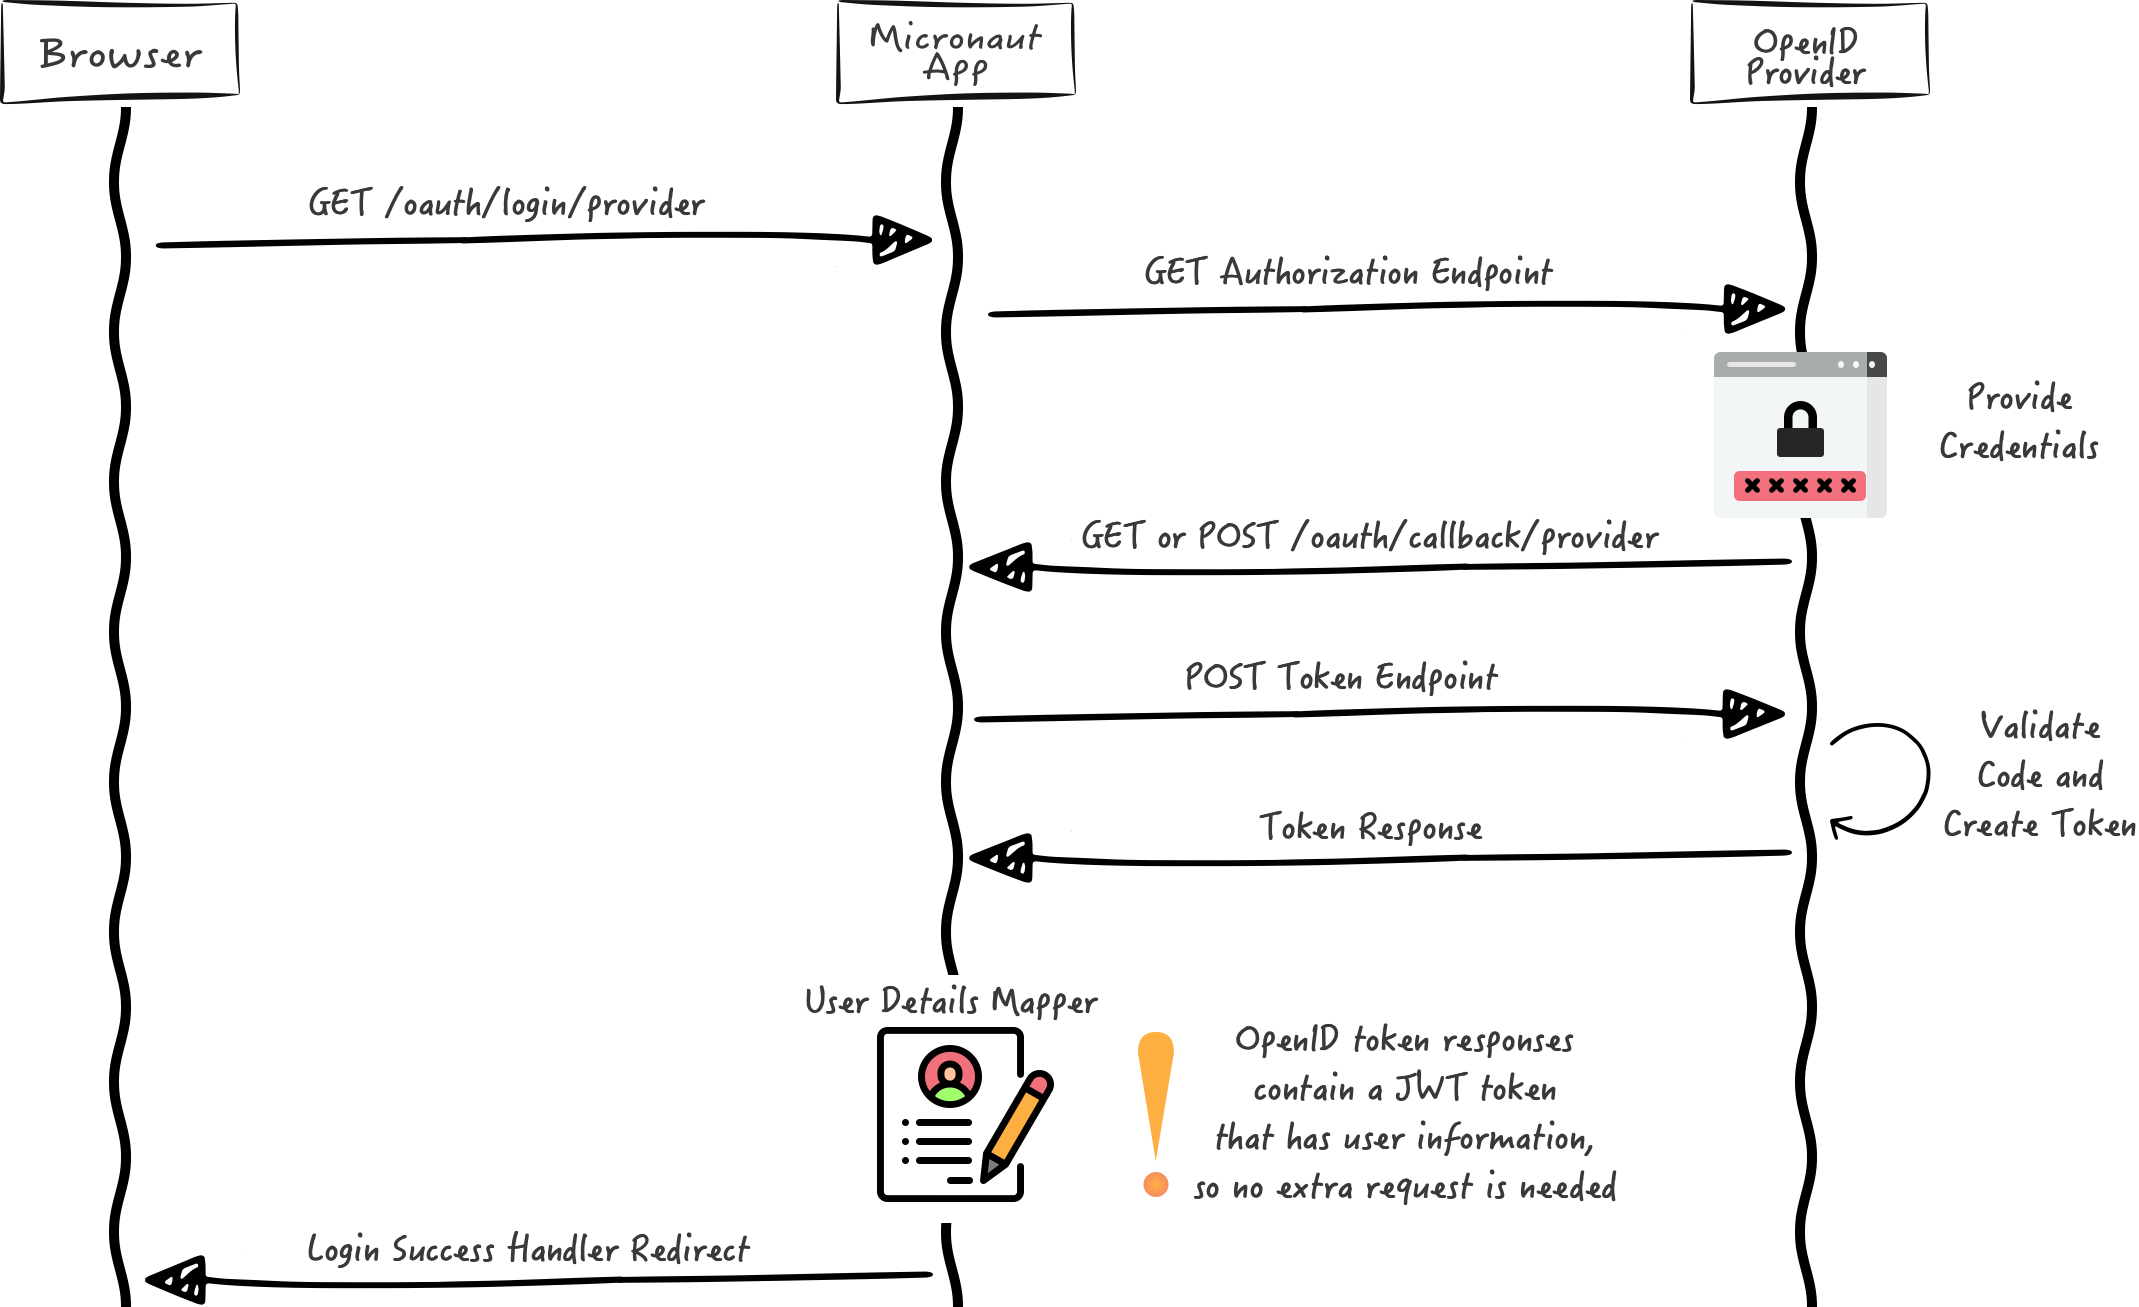
For more information, see openid-configuration documentation.
3. Run the Application #
To run the application, use the following command, which starts the application on port 8080.
./gradlew :gcp:run./mvnw install -pl lib -am
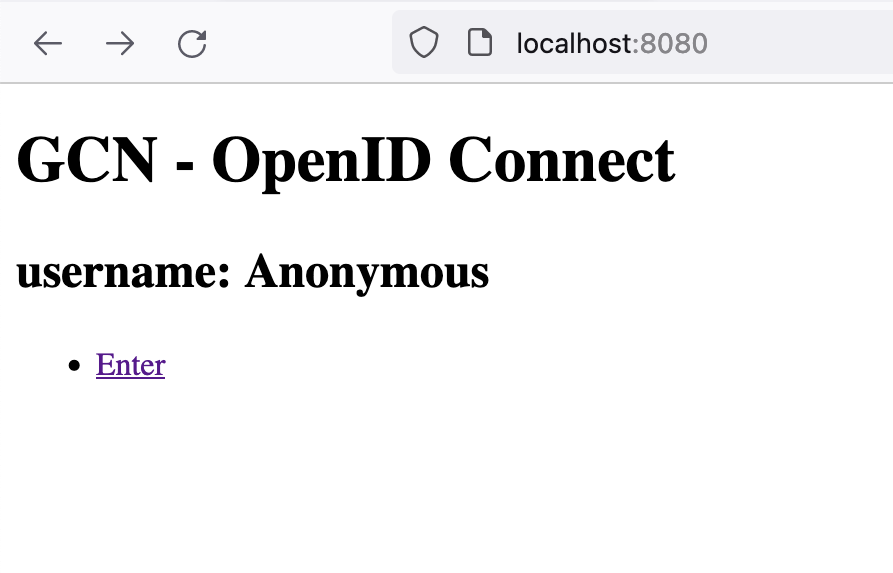
./mvnw mn:graalvm-resources mn:run -pl gcpOpen http://localhost:8080/ in a browser and click Enter. Then enter your sign-in information or click Sign Up to create a new account with your email:
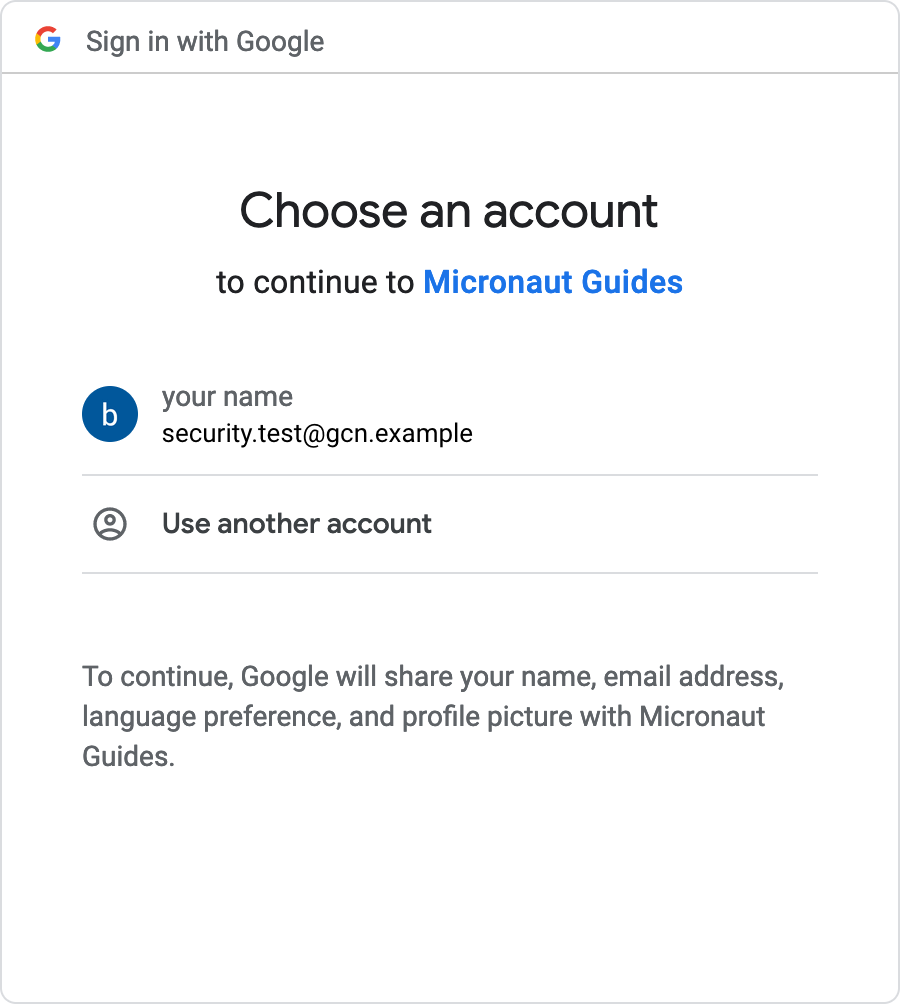
Choose a Google account corresponding to one of the sample users you authorized:
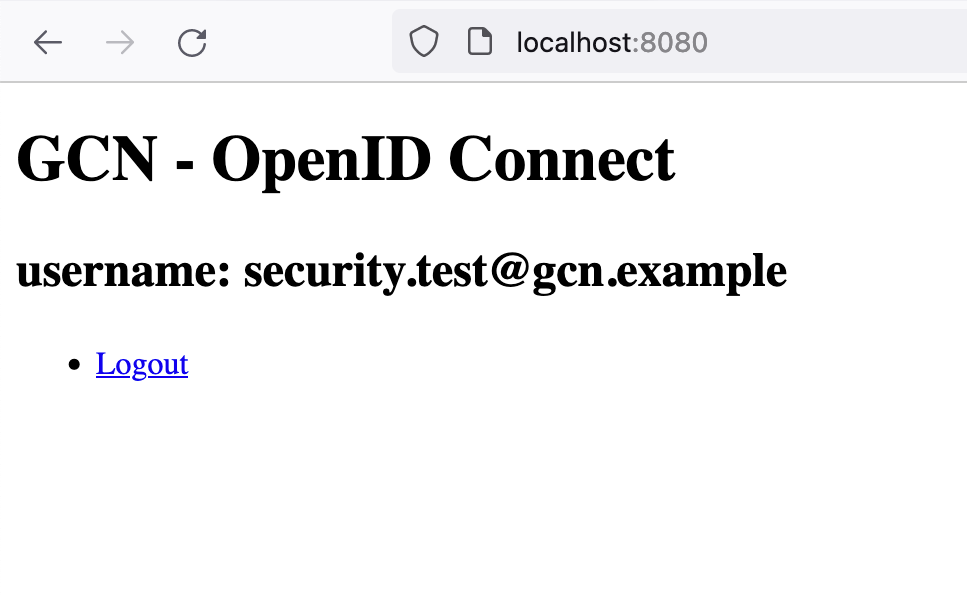
You should see the email address of the authenticated user and a link to logout:
4. Generate a Native Executable Using GraalVM #
GCN supports compiling a Java application ahead-of-time into a native executable using GraalVM Native Image. You can use the Gradle plugin for GraalVM Native Image building/Maven plugin for GraalVM Native Image building. Packaged as a native executable, it significantly reduces application startup time and memory footprint.
To generate a native executable, run the following command:
./gradlew :gcp:nativeCompileThe native executable is created in the gcp/build/native/nativeCompile/ directory and can be run with the following command:
gcp/build/native/nativeCompile/gcp./mvnw install -pl lib -am
./mvnw mn:graalvm-resources package -pl gcp -Dpackaging=native-imageThe native executable is created in the gcp/target/ directory and can be run with the following command:
gcp/target/gcpRun the native executable, then navigate to localhost:8080 and authenticate with Google OpenID Connect.
5. Clean up #
When you have completed the guide, you can clean up the resources you created on Google Cloud Platform so you will not be billed for them in the future.
5.1. Delete the Project #
The easiest way to eliminate billing is to delete the project you created.
Deleting a project has the following consequences:
-
If you used an existing project, you will also delete any other work you have done in the project.
-
You cannot reuse the project ID of a deleted project. If you created a custom project ID that you plan to use in the future, you should delete the resources inside the project instead. This ensures that URLs that use the project ID, such as an appspot.com URL, remain available.
-
If you are exploring multiple guides, reusing projects instead of deleting them prevents you from exceeding project quota limits.
5.1.1. Via the CLI
To delete the project using the Google Cloud CLI, run the following command:
gcloud projects delete gcn-guides
5.1.2. Via the Cloud Platform Console
-
In the Cloud Platform Console, go to the Projects page.
-
In the project list, select the project you want to delete and click Delete project. Select the check box next to the project name and click Delete project.
-
In the dialog box, enter the project ID, and then click Shut down to delete the project.
Summary #
This guide demonstrated how to use GCN to create an OAuth 2.0 application and secure it with Google OpenID Connect. (Google provides OAuth 2.0 APIs for both authentication and authorization.) Then you packaged that application into a native executable with GraalVM Native Image for faster startup and lower memory footprint.