OCI DevOps Tools
The OCI DevOps Tools extension for Visual Studio Code (VS Code) provides features and tools to move and host a local Java project in the Oracle Cloud Infrastructure (OCI) DevOps service, and to perform cloud-side builds and deployments using the CI/CD pipelines. This extension will:
- Create and configure an OCI DevOps project from a local Java project
- Trigger remote build and deployment pipelines from within VS Code
- Deploy built project containers to an Oracle Kubernetes Engine (OKE)
- Audit Java projects’ third-party libraries for vulnerabilities
Supported Java Projects #
- Micronaut®
- Graal Cloud Native
- SpringBoot (the GraalVM Native Support dependency must be enabled in the project)
Requirements #
- Extension Pack for Java.
- Kubernetes.
- GraalVM for JDK 17, or higher.
- Git version control system.
- A Docker-API compatible container runtime such as Rancher Desktop or Docker.
Note: The extension depends on Apache NetBeans Language Server and GraalVM Extension Pack for Java. VS Code installs these dependencies for you.
Extension Installation #
For the best experience you are recommended to install the Graal Cloud Native Extensions Pack which contains this extension and others.
- Navigate to Extensions in the left-hand side Activity Bar.
- Search for “Graal Cloud Native Extensions Pack” in the search field.
- Once found, click Install. It installs the pack from the VS Code Marketplace.
- Reload when required.
Usage #
If you are working with a Graal Cloud Native (or Spring Boot) project, the extension sets up build pipelines to build containers for your Java-based applications and native executables. The extension also creates deployment pipelines that deploy these containers to an OKE cluster.
To get started, configure access to OCI (if you have not yet):
- Create an Oracle Cloud account (free tier is supported)
- Setup an API Key to access OCI
- Create an .oci/config cloud access configuration file
- Install the OCI CLI (needed for the OKE local access)
Having done the above, and with a Graal Cloud Native, or a Spring Boot, project, you can now create an Oracle Cloud Infrastructure DevOps project.
Create an OCI DevOps Project #
-
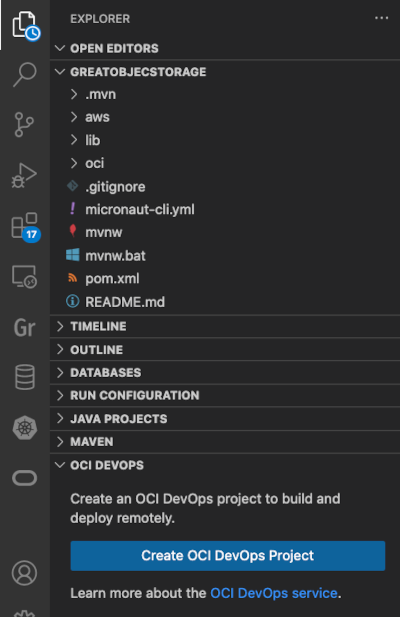
In VS Code Explorer, expand the OCI DevOps panel and click Create OCI DevOps Project. It pushes your project from the local system to a newly created DevOps project in OCI:
-
Follow the prompts to complete creating the OCI DevOps project:
- Choose the OCI profile to be used for OCI access (if multiple profiles are defined).
- Select your compartment in OCI. Your DevOps project will be created there.
- Enter a name for the new DevOps Project (this must be unique within the tenancy).
- Depending on your setup, you might be asked to:
- Confirm the SSH keys for GIT operations and add the OCI GIT server to your SSH config and known_hosts files.
-
Select an existing Oracle Container Engine for Kubernetes (OKE) cluster, or create a new one using the OKE Quick Create action.
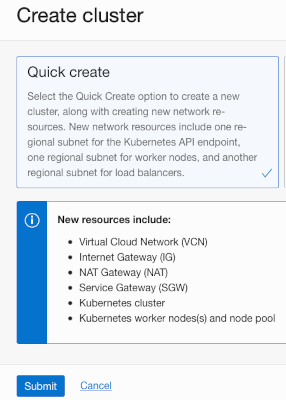
-
When the new OKE cluster is created, configure local access to the OKE Kubernetes cluster using the
VNC-Native Public Endpoint. This is done using the Oracle Cloud Infrastructure CLI and you may have already done this in the prerequisite steps.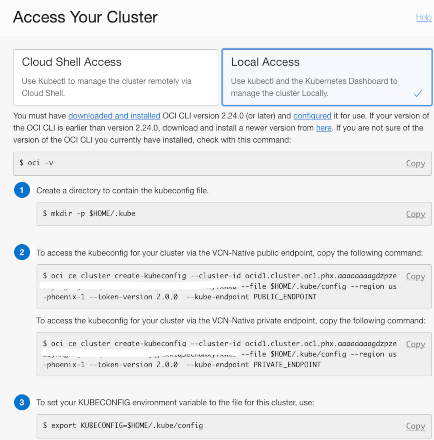
Once an OCI DevOps Project is created, the OCI DevOps view is populated with items representing remote build and deployment pipelines for each project container artifact.
ConfigMap #
The OCI DevOps Tools extension efficiently manages application configurations by creating a ConfigMap artifact within an OCI DevOps project. This artifact is essential for storing key configuration details and is automatically converted into a Kubernetes ConfigMap resource during the deployment pipeline execution. This process ensures that all necessary configuration data, including information about the OCI Vault and datasource, is seamlessly integrated and made available in the Kubernetes environment. For more insights into the OCI Vault and datasource configuration, refer to Creating a Database Application and Connecting to an Oracle Autonomous Database.
Build and Deploy Project Artifacts #
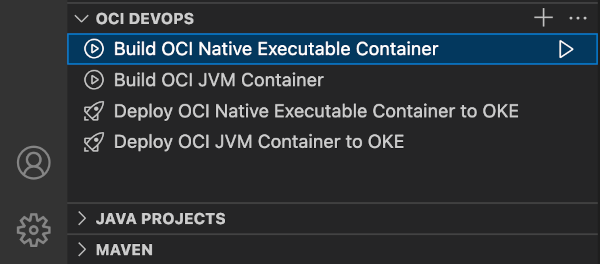
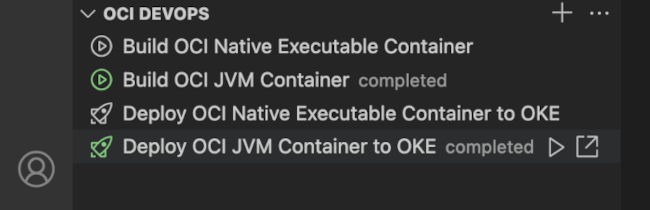
Once an OCI DevOps Project is created, the OCI DevOps view is populated with items representing remote build and deployment pipelines for each project container artifact.
To build a project container artifact, invoke the Run Build Pipeline action for the appropriate build pipeline item. The remote build pipeline is started and VS Code displays its state and build log. After a successful build, either use the Pull Container Image action to pull the resulting container artifact locally, or proceed to deploying the container to OKE.
To deploy a built container artifact, invoke the Run Deployment Pipeline action for the appropriate deployment pipeline item. The remote deployment pipeline is started and VS Code displays its state and deployment log. After a successful deployment, use the Open In Browser action to set up a port forward from OKE and open the deployed application in your web browser.
The build specification files for each pipeline are stored in .devops/. If you update the build specification file, commit and push the change to the DevOps-hosted repository, the build pipelines will be updated to reflect this change. Note that the build pipelines run on custom-sized build runners in order to ensure there is sufficient memory to build all native executables using GraalVM Native Image. These can be customized within the Oracle Cloud Console.
Kubernetes Deployment with OKE #
When the build pipeline succeeds, the container image can be deployed to Oracle Container Engine for Kubernetes (OKE) using the Deploy OCI Native Executable Container to OKE deployment pipeline.
When completed, the application can be tested in a browser by selecting the action Open in Browser.
It sets up the port forwarding, using your local kubectl tool, from OKE to the localhost as indicated by the VS Code status bar:
 .
.
Perform Vulnerability Audits #
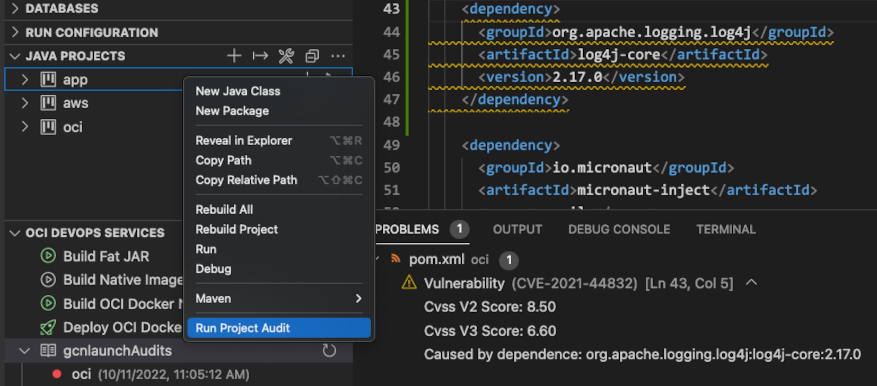
As soon as a new DevOps Project is created, its third-party libraries are audited for vulnerabilities. You can invoke the audit on demand using the OCI DevOps: Audit Project Vulnerability command, or from a Java Project’s view using the Run Project Audit action.
You can also perform vulnerability audits for the Maven and Gradle Java projects not added to an OCI DevOps Project. Use the Devops: Shared Knowledge Base Ocid and Devops: Shared Knowledge Base Profile commands to configure the shared Knowledge Base for performing these audits.
When your project is moved into the DevOps service in OCI, it is scanned for vulnerabilities by the Application Dependency Management service. The results of this audit can be displayed within the OCI DevOps panel by clicking on the plus icon and selecting Add Knowledge Base from the displayed menu.
Display Related OCI DevOps Resources #
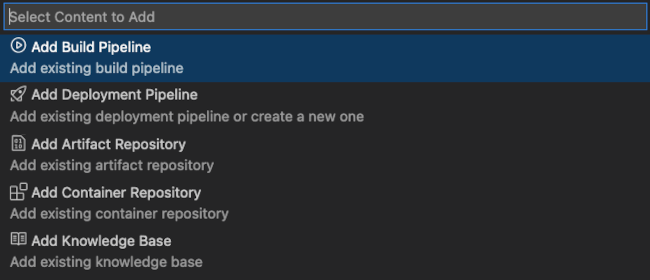
Initially, the only the items displayed in the OCI DevOps view are for build and deployment pipelines related to project container artifacts. You can manually add more resources using the Add OCI DevOps Resource… action displayed in the view caption.
Build Pipelines #
These additional build pipelines are preconfigured for the Java project and can be manually added to the OCI DevOps view:
- Build Fat Jar: builds a single application JAR file
- Build Native Executable: builds a Linux x86 native executable of an application
You can also add and control externally-created build pipelines using this action.
Deployment Pipelines #
All preconfigured deployment pipelines are visible in the OCI DevOps view by default. You can add and control externally-created deployment pipelines using this action. You can also create and add a new deployment pipeline to the view, deploying a container to the OKE.
Artifact Repository #
You can add an artifact repository configured for the DevOps Project to display the non-container artifacts built for the project. These actions are available for an Artifact Repository:
- Display non-container artifacts, including build date and size
- Download built non-container artifacts locally
Container Repository #
You can add container repositories configured for a DevOps project to display the container images built for the project. These actions are available for a Container Repository:
- Display container repository and the images, including a build date
- Pull container images locally
Knowledge Base #
You can add a knowledge base configured for a DevOps project to display the vulnerability audits performed for the project. These actions are available for a Knowledge Base:
- Display vulnerability reports, including an audit date and result
- Shortcut to a detailed online report
Settings #
| Name | Description | Default Value |
|---|---|---|
oci.devops.showToolsPage |
Show the OCI DevOps Tools page on extension activation. | true |
oci.devops.sharedKnowledgeBaseOcid |
An OCID of the shared knowledge base for audits of Java projects, not added to an OCI DevOps project. | |
oci.devops.sharedKnowledgeBaseProfile |
An OCI profile to access the shared knowledge base for audits of Java projects, not added to an OCI DevOps project. | |
oci.devops.bypassDeliverArtifactsStage |
Bypass Deliver artifacts stage in Build pipelines producing Generic artifacts. | true |
oci.devops.pushLocalSourcesToOciConfirmedPermanently |
Restore confirmations before pushing local sources to a remote OCI code repository. | false |
Proxy Setup #
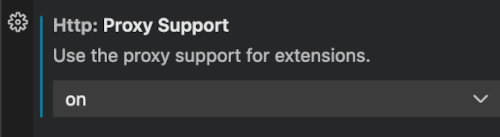
When working behind a firewall over a proxy, Proxy Support in VS Code has to be turned on. In VS Code Settings, set Http: Proxy Support to ON. Subsequently, when working without proxy, set this OFF. Learn more here.
Many tools for working with Java projects, such as Maven, Gradle, kubectl, and docker (if used), may require proxy configuration.
Known Issues #
- Micronaut 4.0.0 Gradle project has a known issue #781 when building with GraalVM Native Image. This issue was already fixed in Micronaut 4.0.1
aotbuild plugin. Openbuild.gradlefile from your project and update theaotplugin to version 4.0.1, e.g.id("io.micronaut.aot") version "4.0.1". Then push updatedbuild.gradleto OCI GIT or re-deploy the project.
Feedback #
If you have suggestions for new features, or if you have found a bug: