Securely Store Application Secrets in Google Secret Manager
This guide describes how to create secrets in Google Secret Manager and easily access them in a Micronaut application.
Instead of storing a database URL, username, and password in plain text or environment variables, a secret manager provides a convenient way to store API keys, passwords, certificates, and other sensitive data while improving security.
Prerequisites #
- JDK 17 or higher. See Setting up Your Desktop.
- A Google Cloud Platform (GCP) account. See Setting up Your Cloud Accounts.
- The GCN CLI. See Setting up Your Desktop. (Optional.)
Note: This guide uses paid services; you may need to enable billing in Google Cloud to complete some steps in this guide.
Follow the steps below to create the application from scratch. However, you can also download the completed example in Java.

A note regarding your development environment
Consider using Visual Studio Code that provides native support for developing applications with the Graal Cloud Native Tools extension.
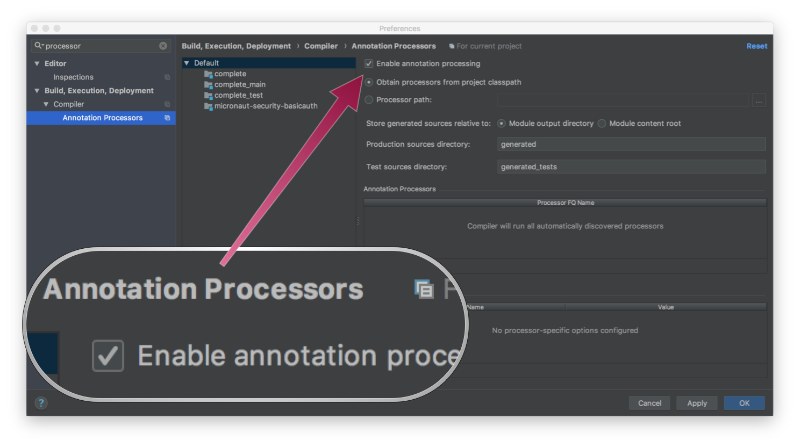
Note: If you use IntelliJ IDEA, enable annotation processing.
Windows platform: The GCN guides are compatible with Gradle only. Maven support is coming soon.
1. Create the Application #
Create an application using the GCN Launcher.
-
Open the GCN Launcher in advanced mode.
- Create a new project using the following selections.
- Project Type: Application (Default)
- Project Name: gcp-secrets-demo
- Base Package: com.example (Default)
- Clouds: GCP
- Language: Java (Default)
- Build Tool: Gradle (Groovy) or Maven
- Test Framework: JUnit (Default)
- Java Version: 17 (Default)
- Micronaut Version: (Default)
- Cloud Services: Database and Secret Management
- Features: GraalVM Native Image and MySQL
- Sample Code: Yes (Default)
- Click Generate Project, then click Download Zip. The GCN Launcher creates an application with the default package
com.examplein a directory named gcp-secrets-demo. The application ZIP file will be downloaded in your default downloads directory. Unzip it, open in your code editor, and proceed to the next steps.
Alternatively, use the GCN CLI as follows:
gcn create-app com.example.gcp-secrets-demo \
    --clouds=gcp \
    --services=database,secretmanagement \
    --features=mysql,graalvm \
    --build=gradle \
    --jdk=17 \
    --lang=java
gcn create-app com.example.gcp-secrets-demo \
--clouds=gcp \
--services=database,secretmanagement \
--features=mysql,graalvm \
--build=maven \
--jdk=17 \
--lang=javaFor more information, see Using the GCN CLI.
GCN adds dependencies to your build file to provide integration between Micronaut applications and Google Cloud, including using Secret Manager as a distributed configuration source, as follows
gcp/build.gradle
implementation("io.micronaut.gcp:micronaut-gcp-secret-manager")gcp/pom.xml
<dependency>
    <groupId>io.micronaut.gcp</groupId>
    <artifactId>micronaut-gcp-secret-manager</artifactId>
    <scope>compile</scope>
</dependency>
1.1. Configure the Database Application #
Use the Create and Connect a Micronaut Application to an OCI MySQL Database guide to create a MySQL database. Follow steps 2 (Create a Google Cloud Platform Project) and 3 (Create a MySQL Database Instance in Google Cloud).
2. Create the Secret #
-
Create a file named datasource-info.properties to contain the JDBC connection information.
Add the following:
 datasources.default.url: jdbc:mysql://<MYSQL_IP>:3306/demo # <1>
 datasources.default.username: <USER_NAME> # <2>
 datasources.default.password: <USER_PASSWORD>
1 Replace
<MYSQL_IP>with the value from thePRIMARY_ADDRESScolumn in the output from the command you used to create the MySQL database.2 Replace
<USER_NAME>(and<USER_PASSWORD>) with the username (and password) you provided in thegcloud sql users createcommand.Example MySQL configuration example for Create and Connect an Application to a MySQL Database:
 datasources.default.url: jdbc:mysql://localhost:3306/db
 datasources.default.username: root
 datasources.default.password: ''
Note: Do not add this file to source control (because it contains sensitive information).
-
Create secrets from the data in datasource-info.properties using the following command:
gcloud secrets create application --data-file=path/to/datasource-info.propertiesNote: You might be prompted to enable the Google SQL Admin API:
API [secretmanager.googleapis.com] not enabled on project [<project-id>].
Would you like to enable and retry (this will take a few minutes)? (y/N)?
See the Google Cloud Secret Manager Support "Configuration file resolution" section for other built-in and manual ways that configuration files can be named other than application as above.
3. Run the Application #
To run the application, use the following command, which starts the application on port 8080.
Note: You might see this error message when running your application:
Message: The Application Default Credentials are not available.
They are available if running in Google Compute Engine.
Otherwise, the environment variable GOOGLE_APPLICATION_CREDENTIALS must be defined pointing to a file defining the credentials.
See https://developers.google.com/accounts/docs/application-default-credentials for more information.
If you are developing locally you can use the following command:
gcloud auth application-default loginHowever, Google strongly recommends that you set up a service account. Follow the instructions in the link above and Micronaut GCP setup instructions to create and configure a service account.
You can test the application in a web browser or with curl.
Run this command from a terminal to create a Genre:
curl -X "POST" "http://localhost:8080/genres" \
     -H 'Content-Type: application/json; charset=utf-8' \
     -d $'{ "name": "music" }'
Then run this command to list the genres:
curl http://localhost:8080/genres/list
4. Generate a Native Executable Using GraalVM #
GCN supports compiling a Java application ahead-of-time into a native executable using GraalVM Native Image. You can use the Gradle plugin for GraalVM Native Image building/Maven plugin for GraalVM Native Image building. Packaged as a native executable, it significantly reduces application startup time and memory footprint.
To generate a native executable, run the following command:
./gradlew :gcp:nativeCompileThe native executable will be created in the gcp/build/native/nativeCompile/ directory.
./mvnw install -pl lib -am
./mvnw package -pl gcp -Dpackaging=native-image
The native executable will be created in gcp/target/ directory.
The application starts on port 8080. Test it as described in the previous section. The application should behave exactly as when you ran it from a JAR file, but with reduced startup time and smaller memory footprint.
5. Stop the Database Instance and Delete the Project #
Use the following command to stop the database instance:
gcloud sql instances patch micronaut-guides-mysql \
    --activation-policy=NEVER
6. Clean Up Cloud Resources #
After you have finished this guide, you can clean up the resources you created on Google Cloud Platform so you will not be billed for them in the future. The following sections describe how to delete or turn off these resources.
The easiest way to eliminate billing is to delete the project.
Deleting a project has the following consequences:
- If you used an existing project, you will also delete all previous resources in that project.
- You cannot reuse the project ID of a deleted project. If you created a custom project ID that you plan to use in the future, you should delete the resources inside the project instead. This ensures that URLs that use the project ID, such as an appspot.com URL, remain available.
- If you are exploring multiple guides, reusing projects instead of deleting them prevents you from exceeding project quota limits.
- In the Cloud Platform Console, go to the Projects page.
- In the project list, select the project you want to delete and click Delete project. After selecting the check box next to the project name, click Delete project.
- In the dialog box, enter the project ID, and then click Shut down to delete the project.
Summary #
This guide demonstrated how to create a Java application that accesses secrets in Google Secret Manager. You also saw how to package this application into a native executable.