Deploying a Java Application to Amazon Web Services App Runner in VS Code
This guide shows you how to create and deploy a containerized Java application to Amazon Web Services (AWS) App Runner. All the steps will be completed in Visual Studio Code (VS Code) using the Graal Cloud Native Extension Pack for VS Code, which allows you to easily containerize and deploy applications to AWS. Please see, Install Graal Cloud Native Tools to install everything required into VS Code for this guide.
AWS App Runner is a fully managed container application service that lets you build, deploy, and run containerized web applications and API services without prior infrastructure or container experience.
This guide describes how to create a basic “Hello World” Java application using the GCN tools locally, containerize it, and deploy it to AWS App Runner from VS Code.
Prerequisites #
- JDK 17 or higher. See Setting up Your Desktop.
- An Amazon Web Services (AWS) account. Create an account at Sign up for AWS.
- The AWS CLI.
- An AWS user with permissions to access Amazon Elastic Container Registry (ECR) and App Runner.
- AWS access keys for your AWS user. See how to obtain your AWS access key.
- A Docker-API compatible container runtime such as Rancher Desktop or Docker.
1. Install Extensions #
To get started, install the Graal Cloud Native Extension Pack and AWS Toolkit for Visual Studio Code extensions.
Graal Cloud Native Extension Pack #
Follow Installing Graal Cloud Native Tools to install the Graal Cloud Native Extension Pack and its dependencies in VS Code.
AWS Toolkit for VS Code #
Install the AWS Toolkit for Visual Studio Code plugin:
- In the VS Code Activity Bar, click the Extensions icon. This opens the Extensions view, which allows you to access the VS Code Marketplace.
- In the search box, search for AWS Toolkit.
- Once found, choose it to see details, and click Install.
- Once installed, if you’re prompted to restart the editor, click Reload Required to finish installation.
After you install the Toolkit for VS Code, notice the AWS icon the VS Code Activity Bar.
2. Create a Java Application Using GCN Tools #
Create a Java application that you will later containerize and deploy to AWS App Runner using the GCN Tools in VS Code.
-
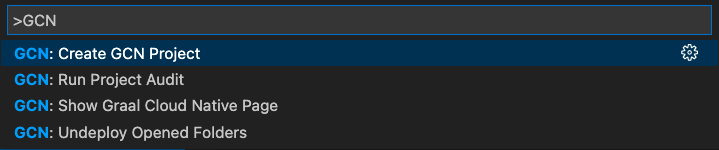
Go to View, Command Palette, search for “gcn”, and invoke the OCI for GCN: Create GCN Project quick action:
- Follow the command prompts to generate a new Maven or Gradle project. For example, to create a simple Java server application:
- Pick Micronaut version: Default
- Pick application type: Application
- Pick project Java: GraalVM or Other Java
- Provide a project name: aws-apprunner-demo
- Provide base package: com.example
- Pick project services: none. Click OK to confirm
- Pick build tool: Gradle (Groovy)
- Pick test framework: JUnit
- Pick cloud platform: AWS. Click OK to confirm
-
Finally, you are asked to select the destination directory on your local disk and whether to open the created project in a new window or add it to the current workspace.
-
(Required only for macOS AArch64) At the very beginning of the configuration file, aws/build.gradle, add the following dependency to use the newer version of JNA:
buildscript { dependencies { classpath("com.github.docker-java:docker-java-transport-httpclient5:3.2.13") { because("macOS AArch64 needs a later version of JNA") } } } -
(Required only for macOS AArch64) At the end of the configuration file, aws/build.gradle, add the following code to make Gradle build a container using the
openjdk:17-slimbase image (it defaults toopenjdk:17-alpinewhich is not multiplatform).tasks.withType(com.bmuschko.gradle.docker.tasks.image.Dockerfile) { baseImage = 'openjdk:17-slim' }
3. Create the Shared AWS Credentials File #
If you have already set your AWS credentials, skip to step 4.
Follow the instructions provided in the AWS documentation to Add your AWS access keys to your environment.
4. Connect to AWS #
Follow the instructions provided in the AWS documentation to Connect to AWS through the Toolkit for VS Code.
5. Configure Access to Amazon Elastic Container Registry #
Amazon Elastic Container Registry (Amazon ECR) is an AWS-managed container image registry service. Amazon ECR supports private repositories with resource-based permissions. Amazon ECR is integrated with Amazon Elastic Container Service (Amazon ECS). Amazon ECR is a regional service.
The following steps walk you through what is needed to push a container image to a private Amazon ECR repository using the AWS CLI. Before you begin, make sure that you have necessary software listed in the Prerequisites. Also, ensure that you have your AWS account id and region identifier (both of these can be obtained from your AWS console).
-
Authenticate to Amazon ECR with
docker(it requires the AWS CLI installed, see Prerequisites). The AWS CLI provides aget-login-passwordcommand to simplify the authentication process. The Docker CLI (docker) can push and pull images with Amazon ECR.Open the Terminal window in VS Code (Terminal > New Terminal) and enter the following command to authenticate:
aws ecr get-login-password --region <region> | docker login --username AWS --password-stdin <aws_account_id>.dkr.ecr.<region>.amazonaws.comReplace <region> with your AWS region key.
AWSis the default username. The password is composed of <aws_account_id>, which is your AWS account ID, and of the <region> key. For example:aws ecr get-login-password --region us-east-1 | docker login --username AWS --password-stdin 1234567890.dkr.ecr.us-east-1.amazonaws.comNote: If you are a Windows user, the command is:
(Get-ECRLoginCommand).Password | docker login --username AWS --password-stdin aws_account_id.dkr.ecr.region.amazonaws.comRead more on Using Amazon ECR with the AWS CLI.
-
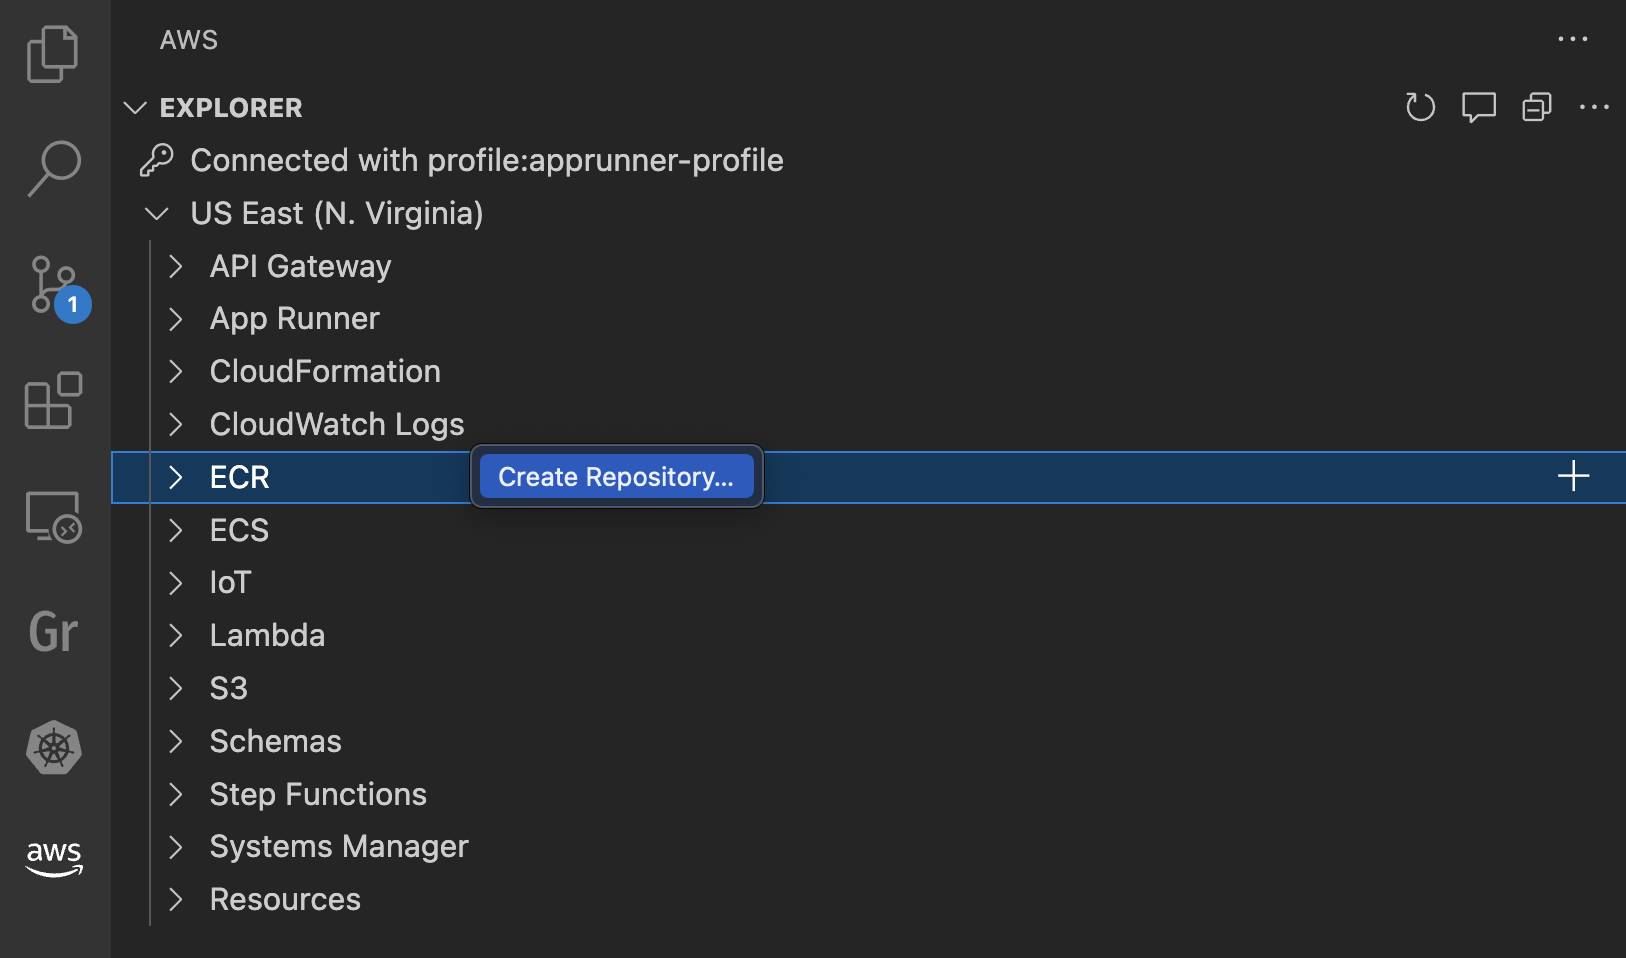
Create a repository in Amazon ECR that will hold your containerized application (a container image). Under your active AWS connection, focus on ECR and click Create Repository:
Enter a repository name, for example, gcn-demo.
-
Add the path (a repository URI) to your newly created repository in the build configuration file. To get the correct path, open the ECR repositories list, right-click your new repository, and click Copy Repository URL:

Now open aws/build.gradle and add the following, replacing the path with yours:
 dockerBuild {
     images = ["aws_account_id.dkr.ecr.region.amazonaws.com/repository_name:$project.version"]
 }
You are all set to build a container image for your application and push it to Amazon ECR.
6. Containerize and Push a Container Image #
In this section, you create a container image of your Java application, and then push the image to Amazon ECR.
Note: The build and deployment architecture must match. You cannot build a container image on an AArch64 platform and deploy it to an Intel-based platform, such as Amazon Elastic Compute Cloud (Amazon EC2) or Amazon Elastic Kubernetes Service (Amazon EKS).
-
Build the project with Gradle, using the following command in your VS Code terminal:
./gradlew clean build -
Build a container image of the application. Note that, because you created the application using GCN Tools in VS Code, you do not need to provide a Dockerfile. It is provided by the extension at build time.
./gradlew dockerBuildQuery
dockerto list your newly built image:docker images | head -n2 -
Push the image:
./gradlew dockerPush
After your container image has been pushed to the Amazon ECR repository, you can pull it using the following command:
docker pull aws_account_id.dkr.ecr.region.amazonaws.com/hello-repository:latest
Now that your application image is stored in Amazon ECR, you can run it using the AWS App Runner service.
7. Create an App Runner Service from ECR and Run the Application #
AWS App Runner is a fully managed container application service that lets you build, deploy, and run containerized web applications and API services. Thanks to the GCN Tools extension in VS Code, you do not have to set up anything to start using AWS App Runner. Go ahead and create an App Runner service.
-
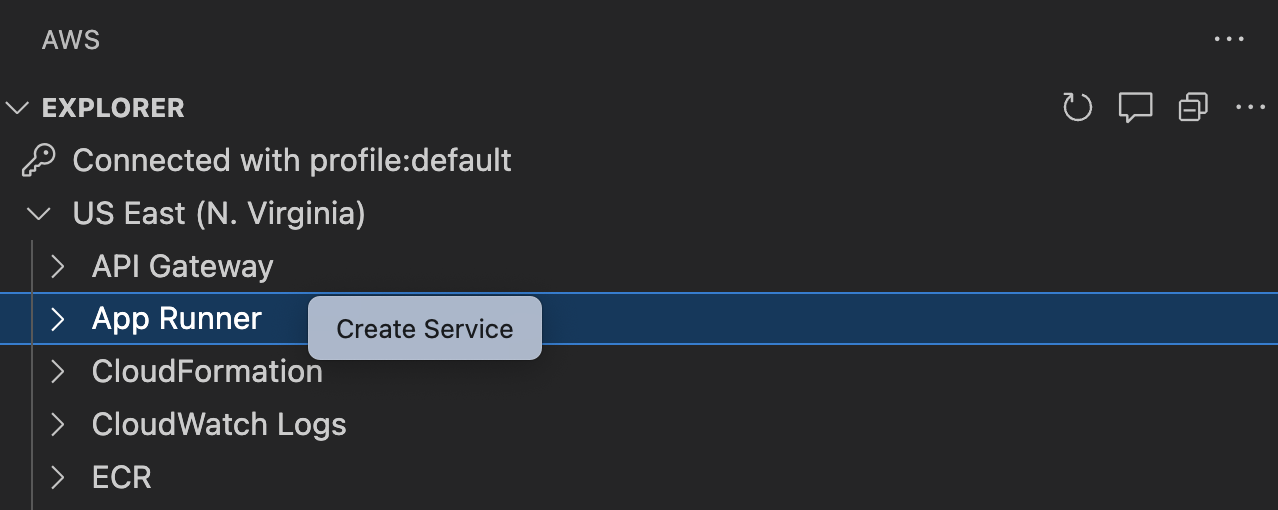
In the AWS:EXPLORER panel, under your connection, right-click App Runner. Select Create Service:
Follow the steps.
-
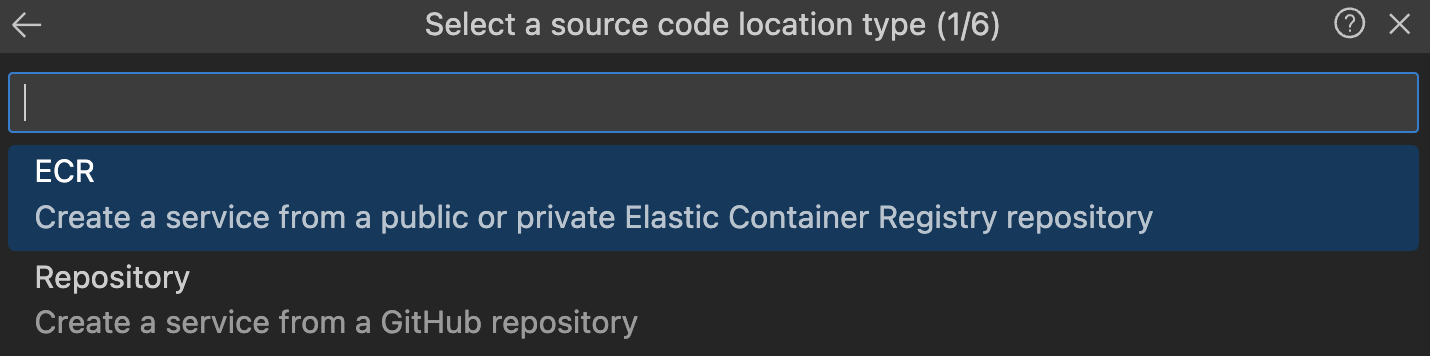
Select ECR as a source code location type:
-
Select the AWS ECR repository containing your application image.
-
Select an ECR tag (a version tag).
-
Select a user role:

Note: If you are using an Amazon ECR private registry, you need the
AppRunnerECRAccessRoleECR access role. This role allows App Runner to access Amazon ECR. See the AWS documentation to create this role. You do not require an access role if your image is stored in Amazon ECR Public (where images are publicly available). -
Enter a port number for the new service.
-
Choose Skip for configure environment variables:

-
Input a name for your service, for example, gcn-demo.
-
Select an available instance configuration. Choose the smallest:

Wait for the deployment to complete (it may take some minutes). The service status should change to Running:
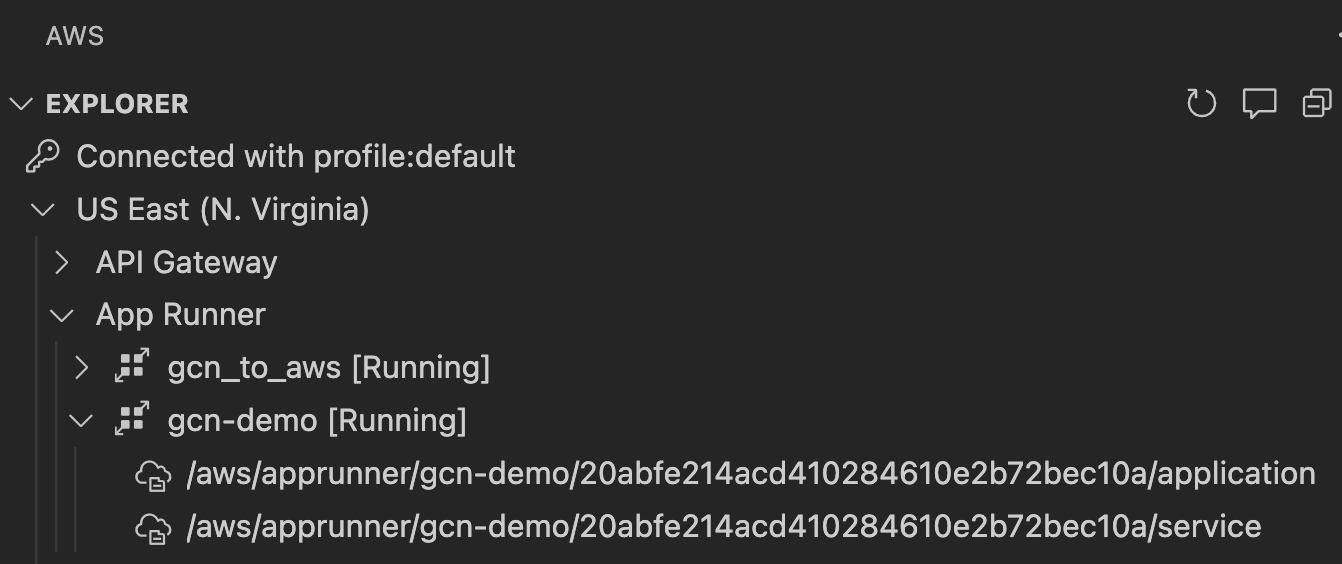
-
-
Open the application in your browser or send a
curlrequest. Right-click your running service, and click Open in Browser: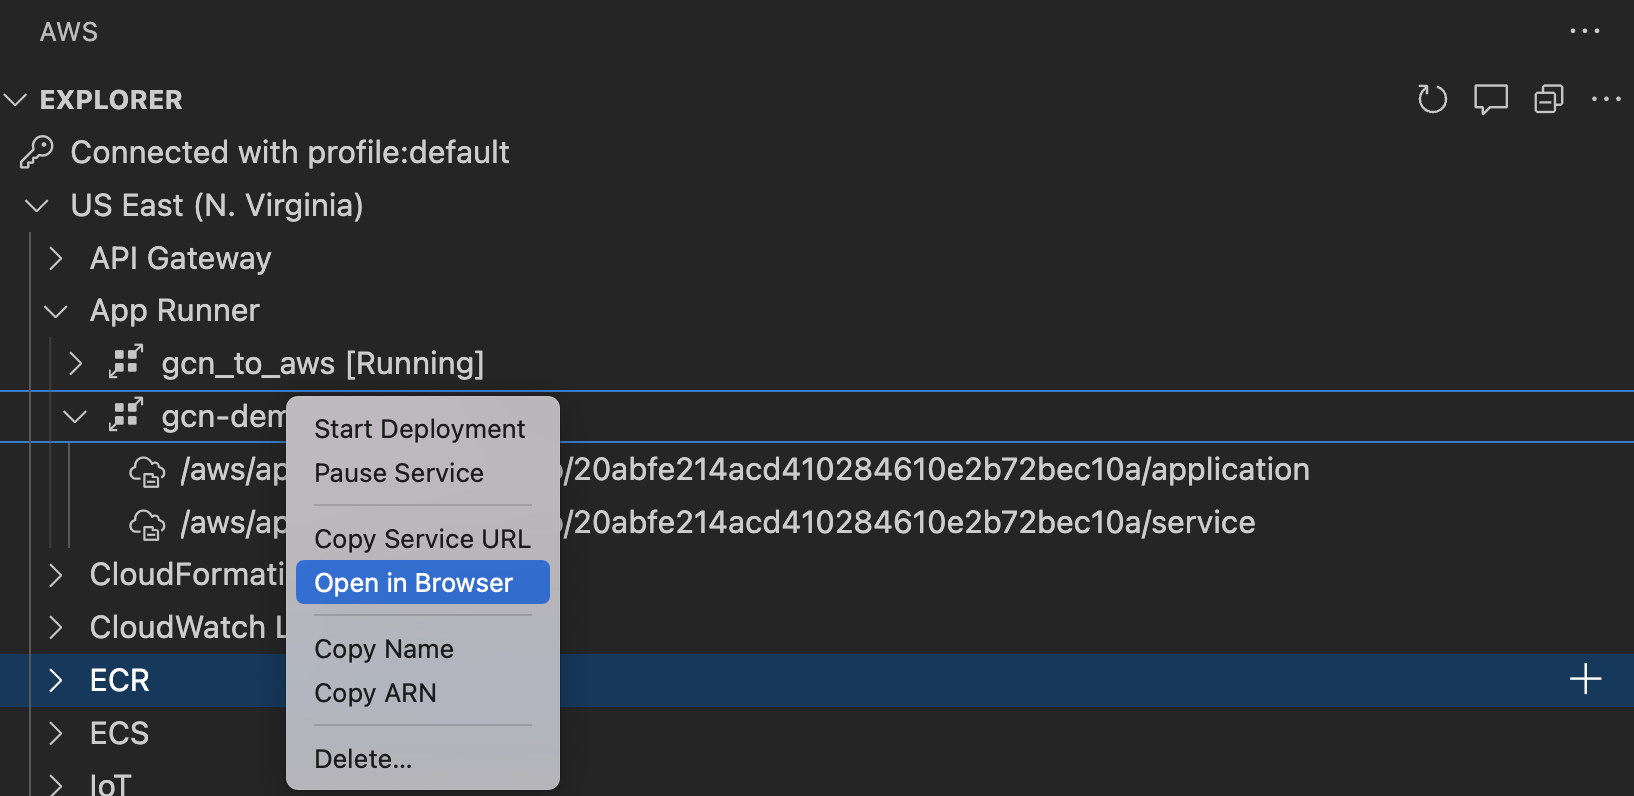
Confirm the action.
There are other tasks you can perform on your App Runner service from VS Code, such as Pause Service, Start Deployment, deploy a new application version, and so on.
Note that App Runner does not support automatic deployment for Amazon ECR public images. Learn more about AWS App Runner from its documentation.
Summary #
Thanks to the GCN integration with VS Code, you can easily deploy your applications to AWS. Having established a connection to AWS, you can create an App Runner service, push and pull images from AWS Elastic Container Registry (ECR), run and re-deploy the application - everything from within VS Code.